Showing posts with label tutorial. Show all posts

Friday, August 21, 2015

rick-rack trimmed car seat canopy...

I'm finally getting in gear and working on some baby girl projects.
HOORAY!

This car seat canopy turned out so gosh-darn cute.

This tutorial is very similar to my original car seat canopy, but I updated some of the measurements and added adorable rick-rack trim.

For this project you will need:
Two co-ordinating fabrics (1 1/4 yards each)
Jumbo rick-rack trim (5 yards)
Sew-on velcro
Contrasting thread


Start by cutting your co-ordinating fabrics into 40 x 35.5 inch rectangles.
Place them right sides together, then use a bowl to round the corners.

Pin your rick-rack around the inside edge of the bottom fabric.
(This is the most tedious part of the whole project. Blerg!)
I made sure I could see the edge of the fabric in each dip, but I wish I would have gone a little deeper. (It has to be pinned in farther than you think, so when you turn it right-side out, the trim actually shows.)

Next sew 1/4" all the way around, leaving a gap for turning.
Before you begin, you might want to iron your fabric WAY better than I did.  Haha. :)

Clip the corners to reduce bulk, then turn it right side out.

Press the entire canopy with your iron so it's nice and flat, then topstitch 1/8" all the way around.

Now for the straps...
Cut four 8 x 4 inch rectangles from one of your fabrics (I went with the contrasting print.), and press the top edge about 1/2" to the back.

Pin rick-rack to the right side of the fabric down each long side, leaving a little extra hanging over the top folded edge.  (You will tuck it in later.)

Pin one of the other 8 x 4 rectangles on top.

Sew 1/4" all the way around, leaving that top folded edge open for turning.

Clip the corners, turn right side out, and press with your iron.

Tuck in & pin the edges of the rick-rack at the top, then topstitch 1/8" all the way around the strap.
I actually did two rows of topstitching, just for cuteness.

Cut some approx. 2 inch pieces of velcro...whatever fits your finished strap best.
Sew one to the top of your strap, and then make sure to sew the other to the bottom of your strap on the opposite side, so when you fold the strap the hook and loop sides meet.

Next, you will need to position the straps so they will fit around the handle of your car seat. If you have the seat you are going to use, you can create a custom fit so the straps attach to the handle just the way you like. Here are the measurements I used:
(Be aware I like mine a little further apart so the straps aren't in the way of the hand grip. If you are making one as a gift, you may want to scootch them toward the middle a little bit.)

Now you just need to do three rows of stitching in the middle of each strap to secure them to the canopy...

...and you are DONE! :)


You can tote your sweet little guy or gal around in style!

Fabrics I used:
Floral--"Maisie" Blend Fabrics
Aqua Lattice--JoAnn
Coral rick-rack--JoAnn

Tuesday, May 14, 2013

DIY photo keychain...

Sometimes it's hard to come up with gifts for people who have everything they could want or need, so this Mother's Day I gave the grandmas a little version of their grandson...a cute photo keychain.  (Don't worry - I made one for myself, too!)  This would be a fun, simple gift that you can easily customize for anyone.


You'll need:
a small wooden shape
a drill
craft paint
scrapbook paper
xacto knife
a photo (small enough to fit on your shape)
mod podge & mod podge dimensional magic
jump ring, chain, and split ring

Start by drilling a small hole at the top of your shape and painting the edges the color of your choice.  (My shape is 1 1/4" x 1" rectangle, but you could use any shape--circle, star, heart--whatever.)


Next, cut a little piece of scrapbook paper slightly larger than your shape.  This will serve as the back of your keychain.  (You could also put names, dates, etc. on the back if you want.)  Spread a thin layer of mod podge on the wood surface and on the back of the paper.  Smooth paper in place and let dry.


Turn wood shape over and trim off excess paper...


then spread another thin coat of mod podge on top and allow to dry.  Use a pin or toothpick to poke out the hole you drilled.


Now finish off the back with a coat of dimensional magic and let it set up according to package directions.  (If you've never worked with it before see this past tutorial of mine for some tips!)  This will create a shiny finished look.


Once the back is dry, you can just repeat the process for the photo on the front.  I just printed mine on photo paper on my home printer so I could get it exactly the size I wanted.


Mod podge it on and trim it up...


Add another coat of podge, poke your hole... 


...and do a layer of dimensional magic.


When it's dry, add your jump ring, chain, and a split ring (all found in the craft store jewelry making section) and that's a wrap!


You could use any kind of image--a favorite vacation pic, your kiddos or grandkids or significant other, pets, a little collage.  Endless possibilites.


Thursday, March 14, 2013

asymmetrical circle scarf...

I started this project thinking I'd make one of those scarves from an old t-shirt that have circled blogland, but once I cut up the shirt, the serged side seams of shirt bugged me.  So used some fabric to fix the problem and came up with my own take on the circle scarf.


I just winged the first one hoping for the best.

It turned out great so obviously I had to make another, taking photos along the way.  All you need is a t-shirt, some coordinating fabric, and the usual sewing stuff.


Start by cutting your t-shirt like this...

The body of the shirt will make up your scarf.  You can cut it shorter if it's a long shirt and you don't want it to be too bulky.  (The purple one I made first has more fabric and I actually like it better.  But adjust for your own personal preference.)

Grab that tube of fabric and stretch it so it becomes more scarf-shaped.

See those pesky serged seams on the inside?  We're going to cover those up.

Cut two pieces of fabric slightly longer than the width of your scarf.  Make one piece wide and the other skinny...the asymmetry will add visual interest to the finished scarf.  I didn't even measure.  Just cut two strips however you please.

Grab one of your fabric strips and iron each of the raw edges under...

...then pin over the top of the serged hem.  (The inside of the shirt will become the outside of the scarf.  With most t-shirt knits, this shouldn't be an issue.)

Top-stitch all the way around your strip of fabric using a stretch stitch (looks like a lightning bolt) or zigzag stitch.  This will allow the knit to stretch without popping the seam.

Repeat this process with the other fabric strip and you're done!

The purple knit shirt had more stretch to it and I think it drapes way better.  The watermelon one is kinda droopy.  Still cute though.  Experiment and see what works for you!

Monday, December 17, 2012

baby keepsake handprint ornament...

With a little newborn in our family, I've been trying to find ways to make my son's first Christmas special and also enjoy his tiny baby-ness while it lasts.  He's already grown so much in a month!

I really wanted to make some kind of handprint ornament and this simple clay version is what I came up with...


I don't have step-by-step pictures, but the process is quite simple.


I started with a package of Sculpey Bake Shop clay.  The Bake Shop line is supposed to be geared towards kids...but it seems exactly the same as Sculpey III to me.  (At my craft store, the Bake Shop line was a dollar cheaper for the same amount of clay.)  It comes in a variety of colors.  I went for a basic white.


If you are unfamiliar with Sculpey, it's an oven-bake polymer clay popular among crafters.  It's inexpensive and an easy product to use...so don't be afraid to try it!  I used one 2 oz. package for a one-month old baby handprint.  If you are going to make a handprint for an older kid, you'll need to get additional packages.

I kneaded the clay in my hands for a couple of minutes to soften it up, rolled it into a ball, and flattened it into a round disc shape.  Then I smooshed my sleepy baby's hand into the clay--this is the trickiest part!  If your handprint doesn't turn out, just roll it back up, flatten it out, and try again. :)  After I got a good print, I poked a ribbon hole.  I used a bamboo skewer but just use whatever you have handy--a toothpick, straw, etc.  Finally, bake according to package directions and thread your ribbon through when your ornament has cooled off.

This darling ornament is now my favorite one on the tree!


I'm sure I will tear up over it as we decorate each year at Christmas time.  
Motherhood has made me extra sentimental! :)

Monday, December 3, 2012

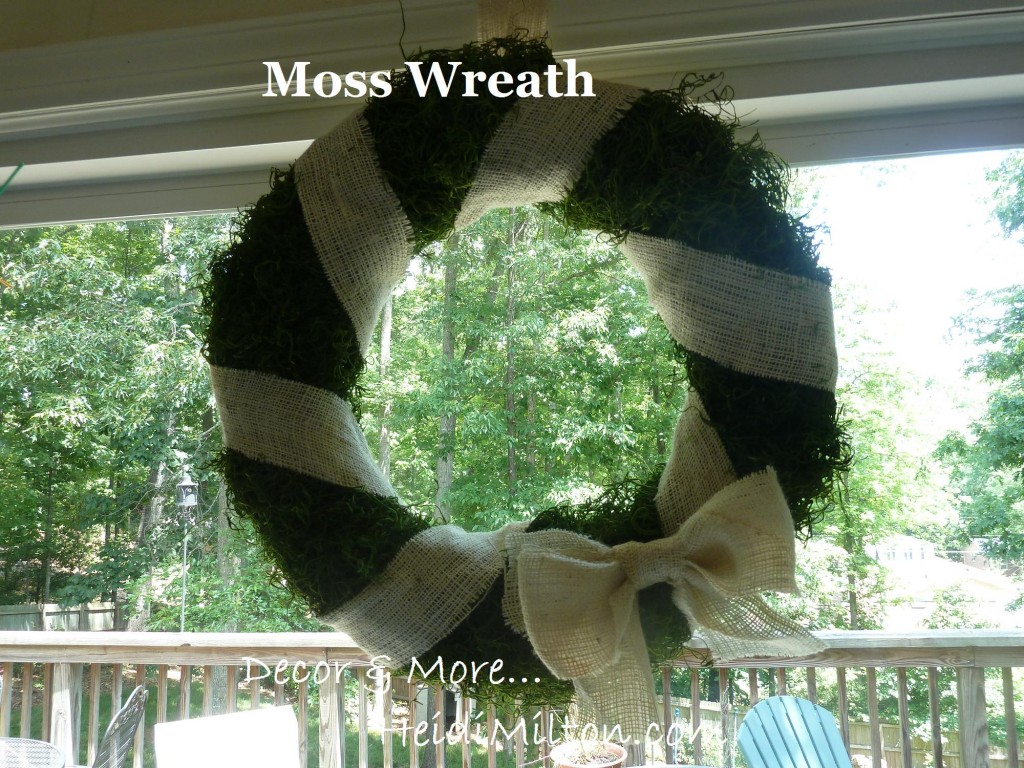
guest post: moss & burlap wreath tutorial {by Decor & More}

Hello, Stay-at-Home Artist readers! I'm Heidi and I blog about home decor DIY and inspiration over at Decor & More


 Kacey's blog was one of the first blogs I started reading and I love her creative spirit, so I'm thrilled to be hanging out over here with y'all. I thought I'd share one of my favorite DIY's to date -- my Moss & Burlap wreath. I made this last spring, but it's hung around (literally) in different rooms of my home ever since. I think it would super simple to tweak for the holidays, too. So here's the how-to!


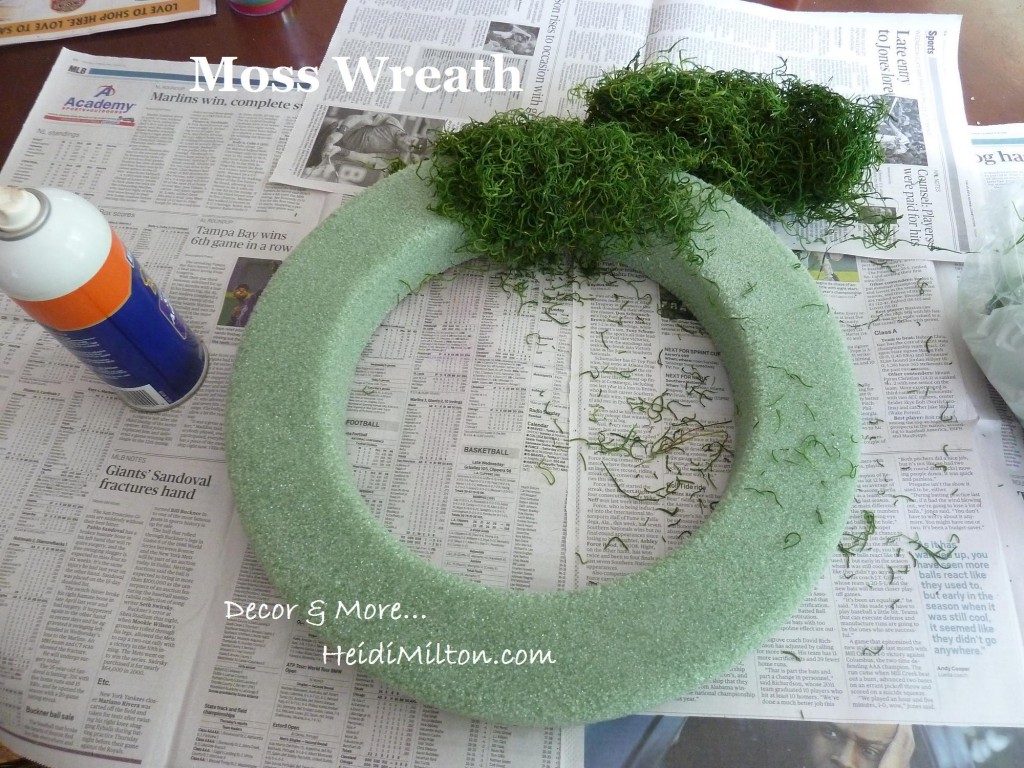
 I gathered up a few things I had laying around from other projects: a wreath form, moss, spray adhesive, and burlap scraps that I cut into strips (a poor girl's version of burlap ribbon!).


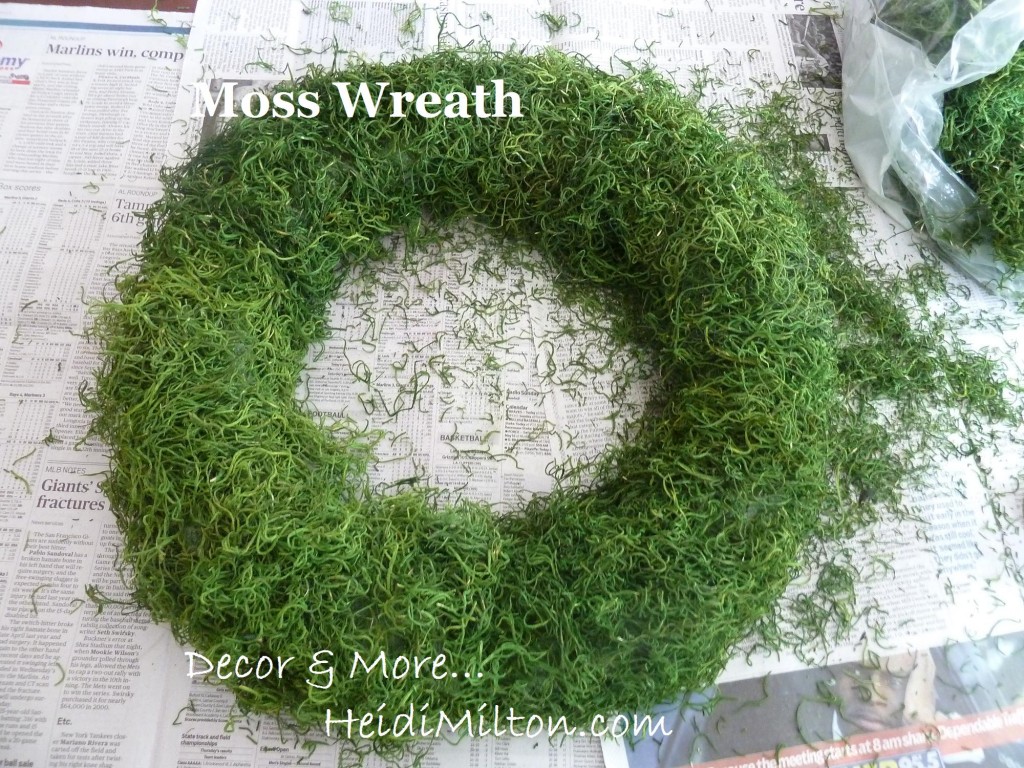
This part was super easy. I simply sprayed my Elmer's Spray Adhesive in small sections and pressed the moss into place once the adhesive became tacky. The hardest part was containing the mess that little bits of the moss made.


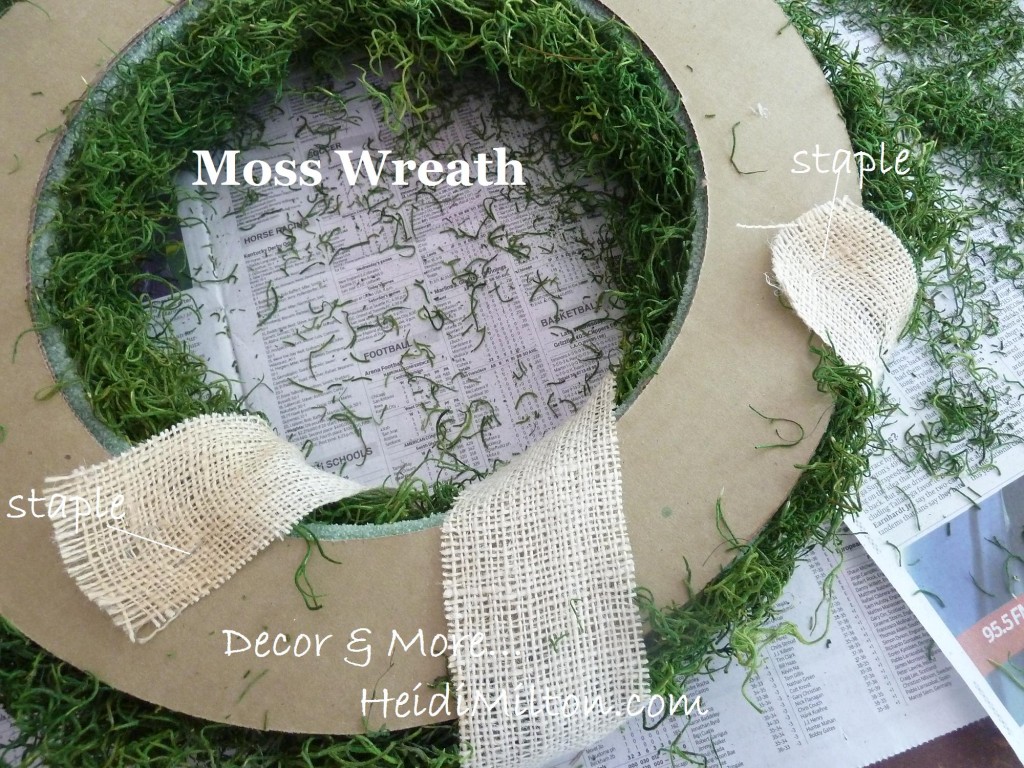
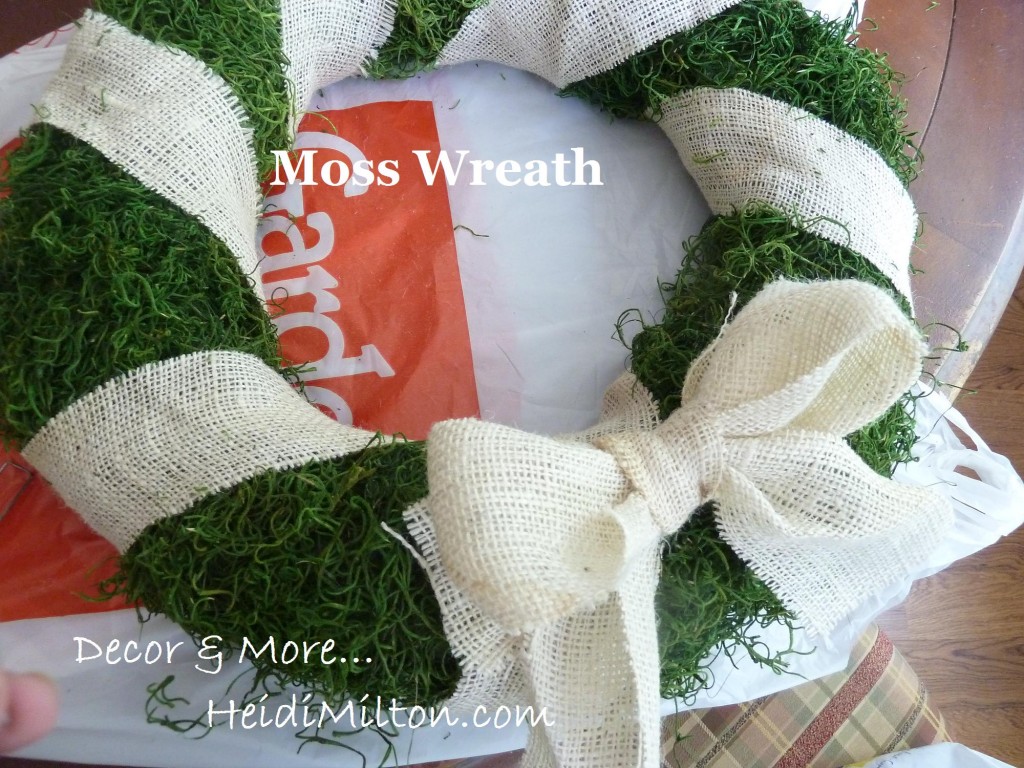
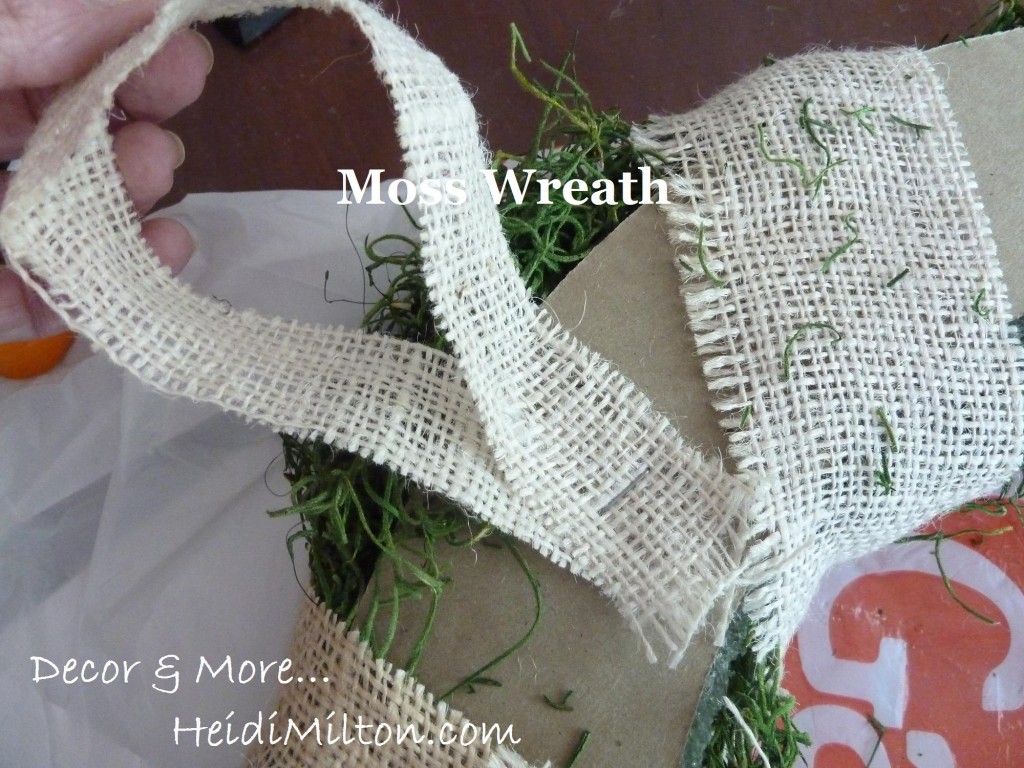
Once it's entirely covered, you made need to beef up your moss in a spot or two. See the mess I made? :) I let everything set for about 15 minutes after I finished applying the moss. Then I started working with my burlap strips. Because I cut these from scraps, each one is only long enough to wrap around the wreath once. So I stapled the ends into the backside of the wreath.


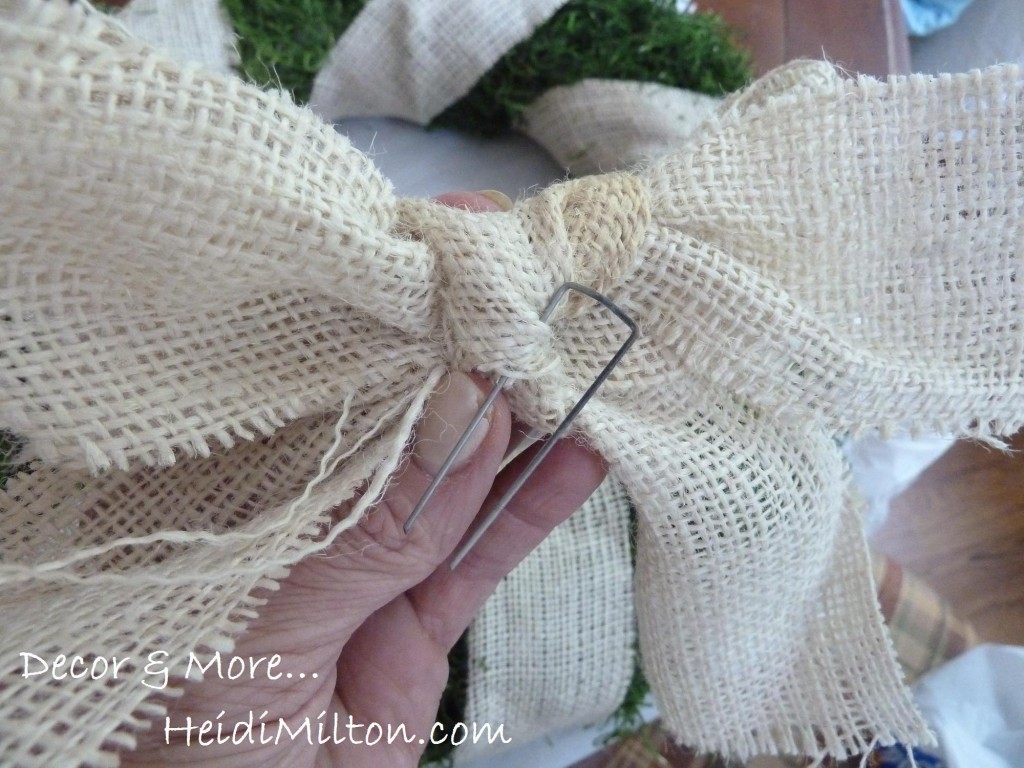
 If you're using a wreath form that doesn't have cardboard backing, you can secure your strips/ribbon with floral tacks. Again, I was using what I had on hand. Now, I knew I wanted a burlap bow on this. So I looked up tutorials on Pinterest. Trouble is, the only ones I found were for burlap tibbon. I was dealing with burlap strips, so all the tutes I tried were utter failures. I resorted to a very simple bow. The simplest of bows. Then I stuck a tack in it.


And stuck it on the wreath, making sure it went into the styrofoam.


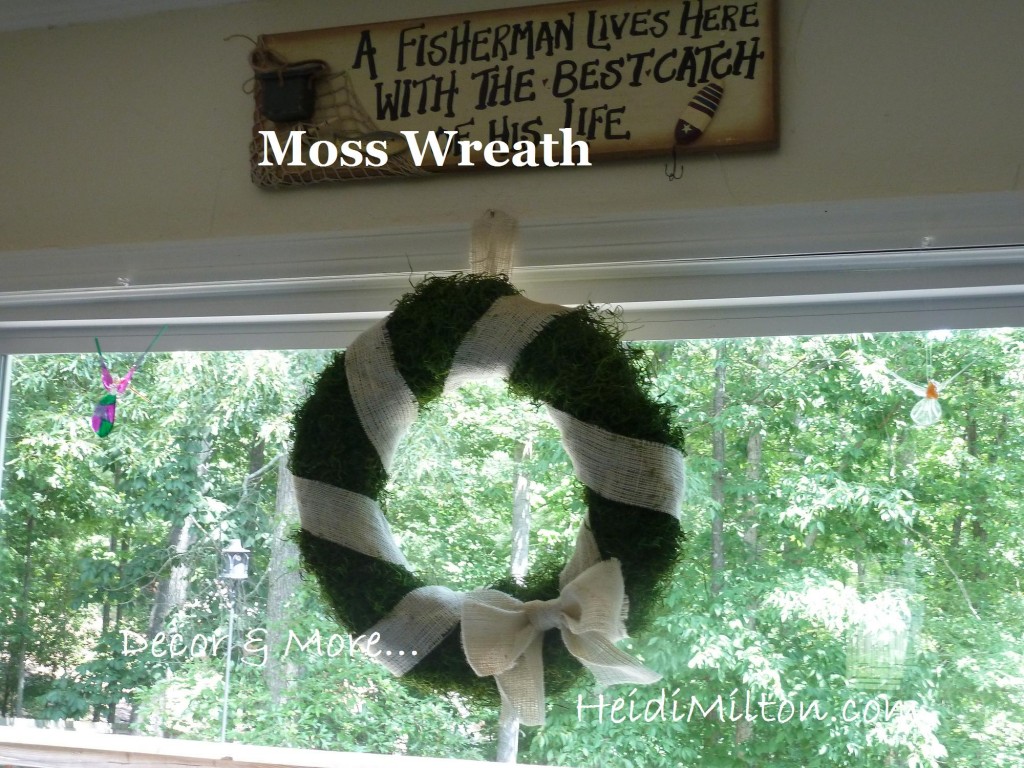
 I used another strip to make a loop on the back for hanging.


You can see how I roll. Easy peasy.


 I'd love to hear from you if you give this project a try! Come visit me at Decor & More anytime... you can also find me on Pinterest, Facebook, and Twitter (@heidimilton). Thanks, Kacey, for having me!! Happy wreath-making!
     
Related Posts Plugin for WordPress, Blogger...