Showing posts with label crafts. Show all posts

Wednesday, September 30, 2015

plywood porch pumpkins...

Can you believe October starts tomorrow?!
The summer and early fall have just flown by.

(And Baby Girl will be here any day now...eek!!!)

I haven't done many projects outside of a little baby sewing (which I will share later), but one of my friends hosted a fun craft night. She had a bunch of project kits to choose from...I went for these adorable plywood porch pumpkins.


It would be so easy to make these on your own if you have the right tools. 
Here's the break down:
  • Cut pumpkin shapes and stems out of plywood. (Mine were already cut for me.)
  • Use craft paint, stencils, & painters tape to paint designs on raw plywood. Make sure you use the "ugly" side as the front. It will soak up the wood stain better...and the knots and imperfections add visual interest.
  • Once your craft paint is dry, rub wood stain over the whole face of each pumpkin & stem. You can add more or less depending on how dark you'd like it to be. Let dry.
  • Next, glue the stems on using wood or hot glue.
  • Finally, use fabric scraps, burlap, or ribbon to embellish your pumpkins however you like.
My new house is still mostly undecorated (I just haven't felt up to it...), but at least I have a little bit of cute fall decor on the porch!

Wednesday, December 5, 2012

guest post: glitterblast typography christmas tree {by Sumo's Sweet Stuff}

Hello everyone!

I’m Sumo, or Summer if you wanna get formal.

profile

I blog over at Sumo’s Sweet Stuff.

Button1

It’s my little place in the blogging world where you can come to find sewing and crafting inspiration. Sewing is my favorite creative outlet, but I’m not afraid to bust out the Mod Podge and paint when the mood strikes. You might also catch me professing my love of Target (or the popcorn store as we call it), talking about my relationships with Lucy (Cameo) and Veronica (sewing machine), or bragging about my three beautiful girls. I have an extreme fondness for Diet Coke, my minivan, historical fiction, and most sweets.

Here is a fun little Christmas craft to get you in the holiday spirit: glitterblast typography Christmas tree!


I'd seen this image on Pinterest (come follow me!) and I had been wanting to re-create it for my house for this holiday season.

Pinned Image

Here's what you need:

- wood (mine was cut to 12x12)
- Krylon Glitterblast sealer
- paint
- paint brush
- vinyl
- transfer tape
- Silhouette or other digital cutter (Lucy!)


Start off by sanding your wood piece and painting one side whatever you want for your base color. Mine was just a metallic white. (I originally tried to do this using a canvas, but my vinyl wouldn't stick to it!) Set this aside to dry.


Create your design in your digital cutter's software. The font I used is called Antelope.


I used Lucy to cut it out on vinyl. It doesn't matter what color; you are only using it as a stencil. Peel up the negative space.


Cut a piece of transfer tape and adhere it down over your vinyl.


Peel up the transfer tape and position your vinyl where you want it on your wood piece. Use a pan scraper or popsicle stick to rub the vinyl down.


Carefully peel up your transfer tape, making sure none of the vinyl is peeling up with it.


Use your glitterblast paint to coat that baby! Let it dry.


Peel up your vinyl.


Spray your decoration with the sealer to help keep the glitter on there.

Done!


Now display your project with pride!


To be honest, I kind of wish that I had done something with more contrast, like red.

But I still think this will look really pretty, shimmering by the glow of the Christmas tree lights, don't you?


Aren't you getting excited for Christmas? It's my favorite! (Just like smiling).

Come visit me over at Sumo's Sweet Stuff! Thanks for having me! 


Monday, December 3, 2012

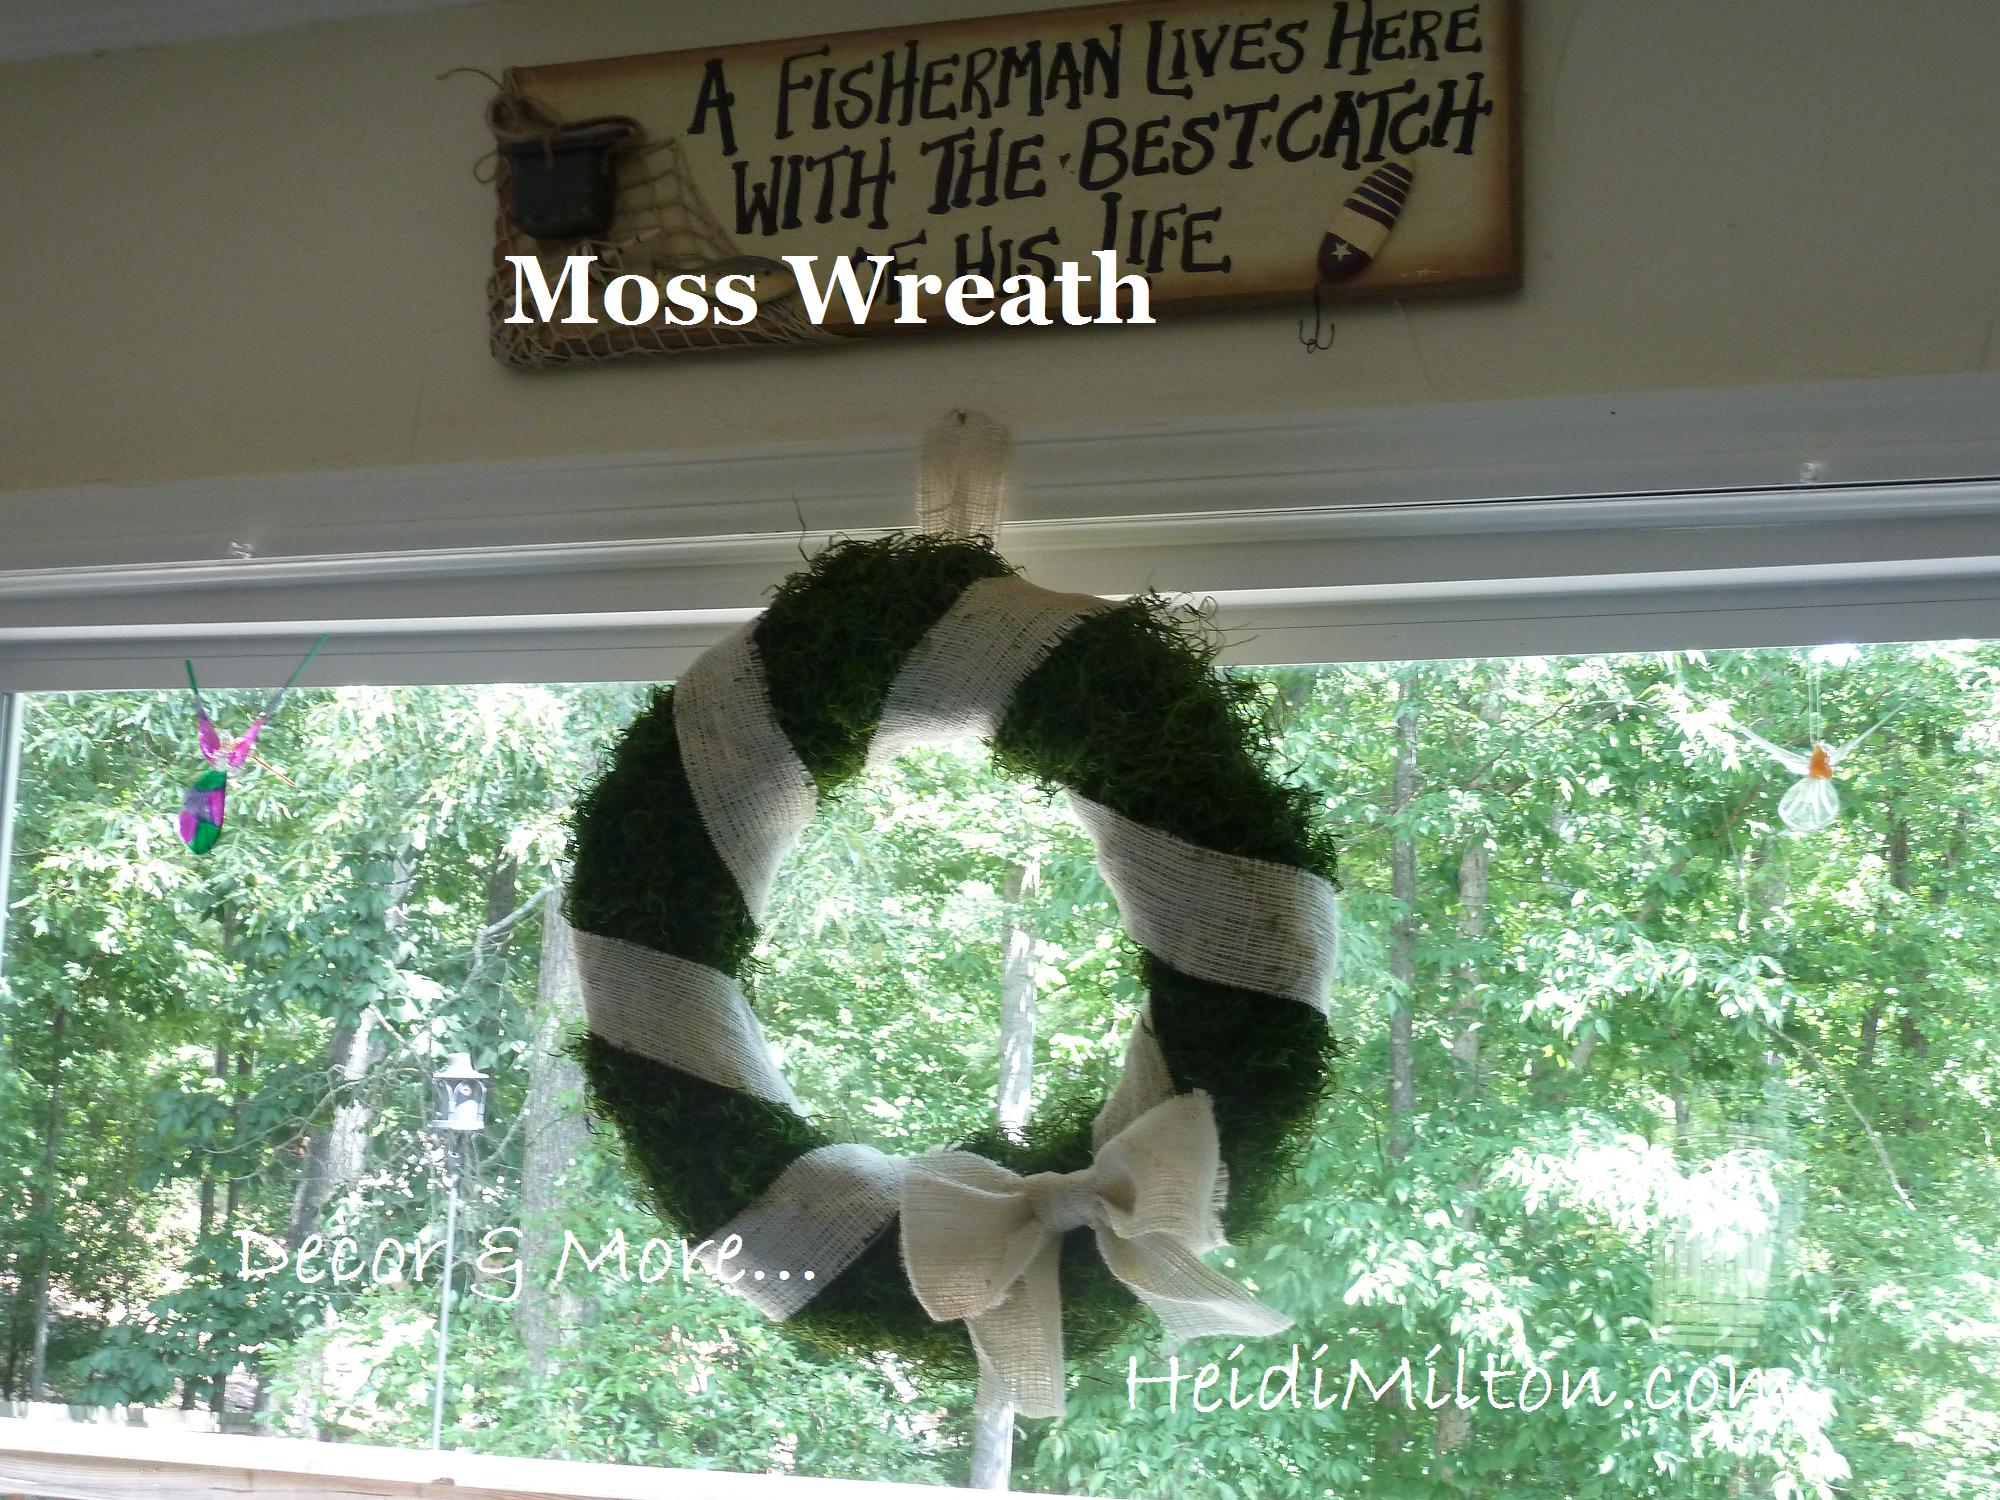
guest post: moss & burlap wreath tutorial {by Decor & More}

Hello, Stay-at-Home Artist readers! I'm Heidi and I blog about home decor DIY and inspiration over at Decor & More


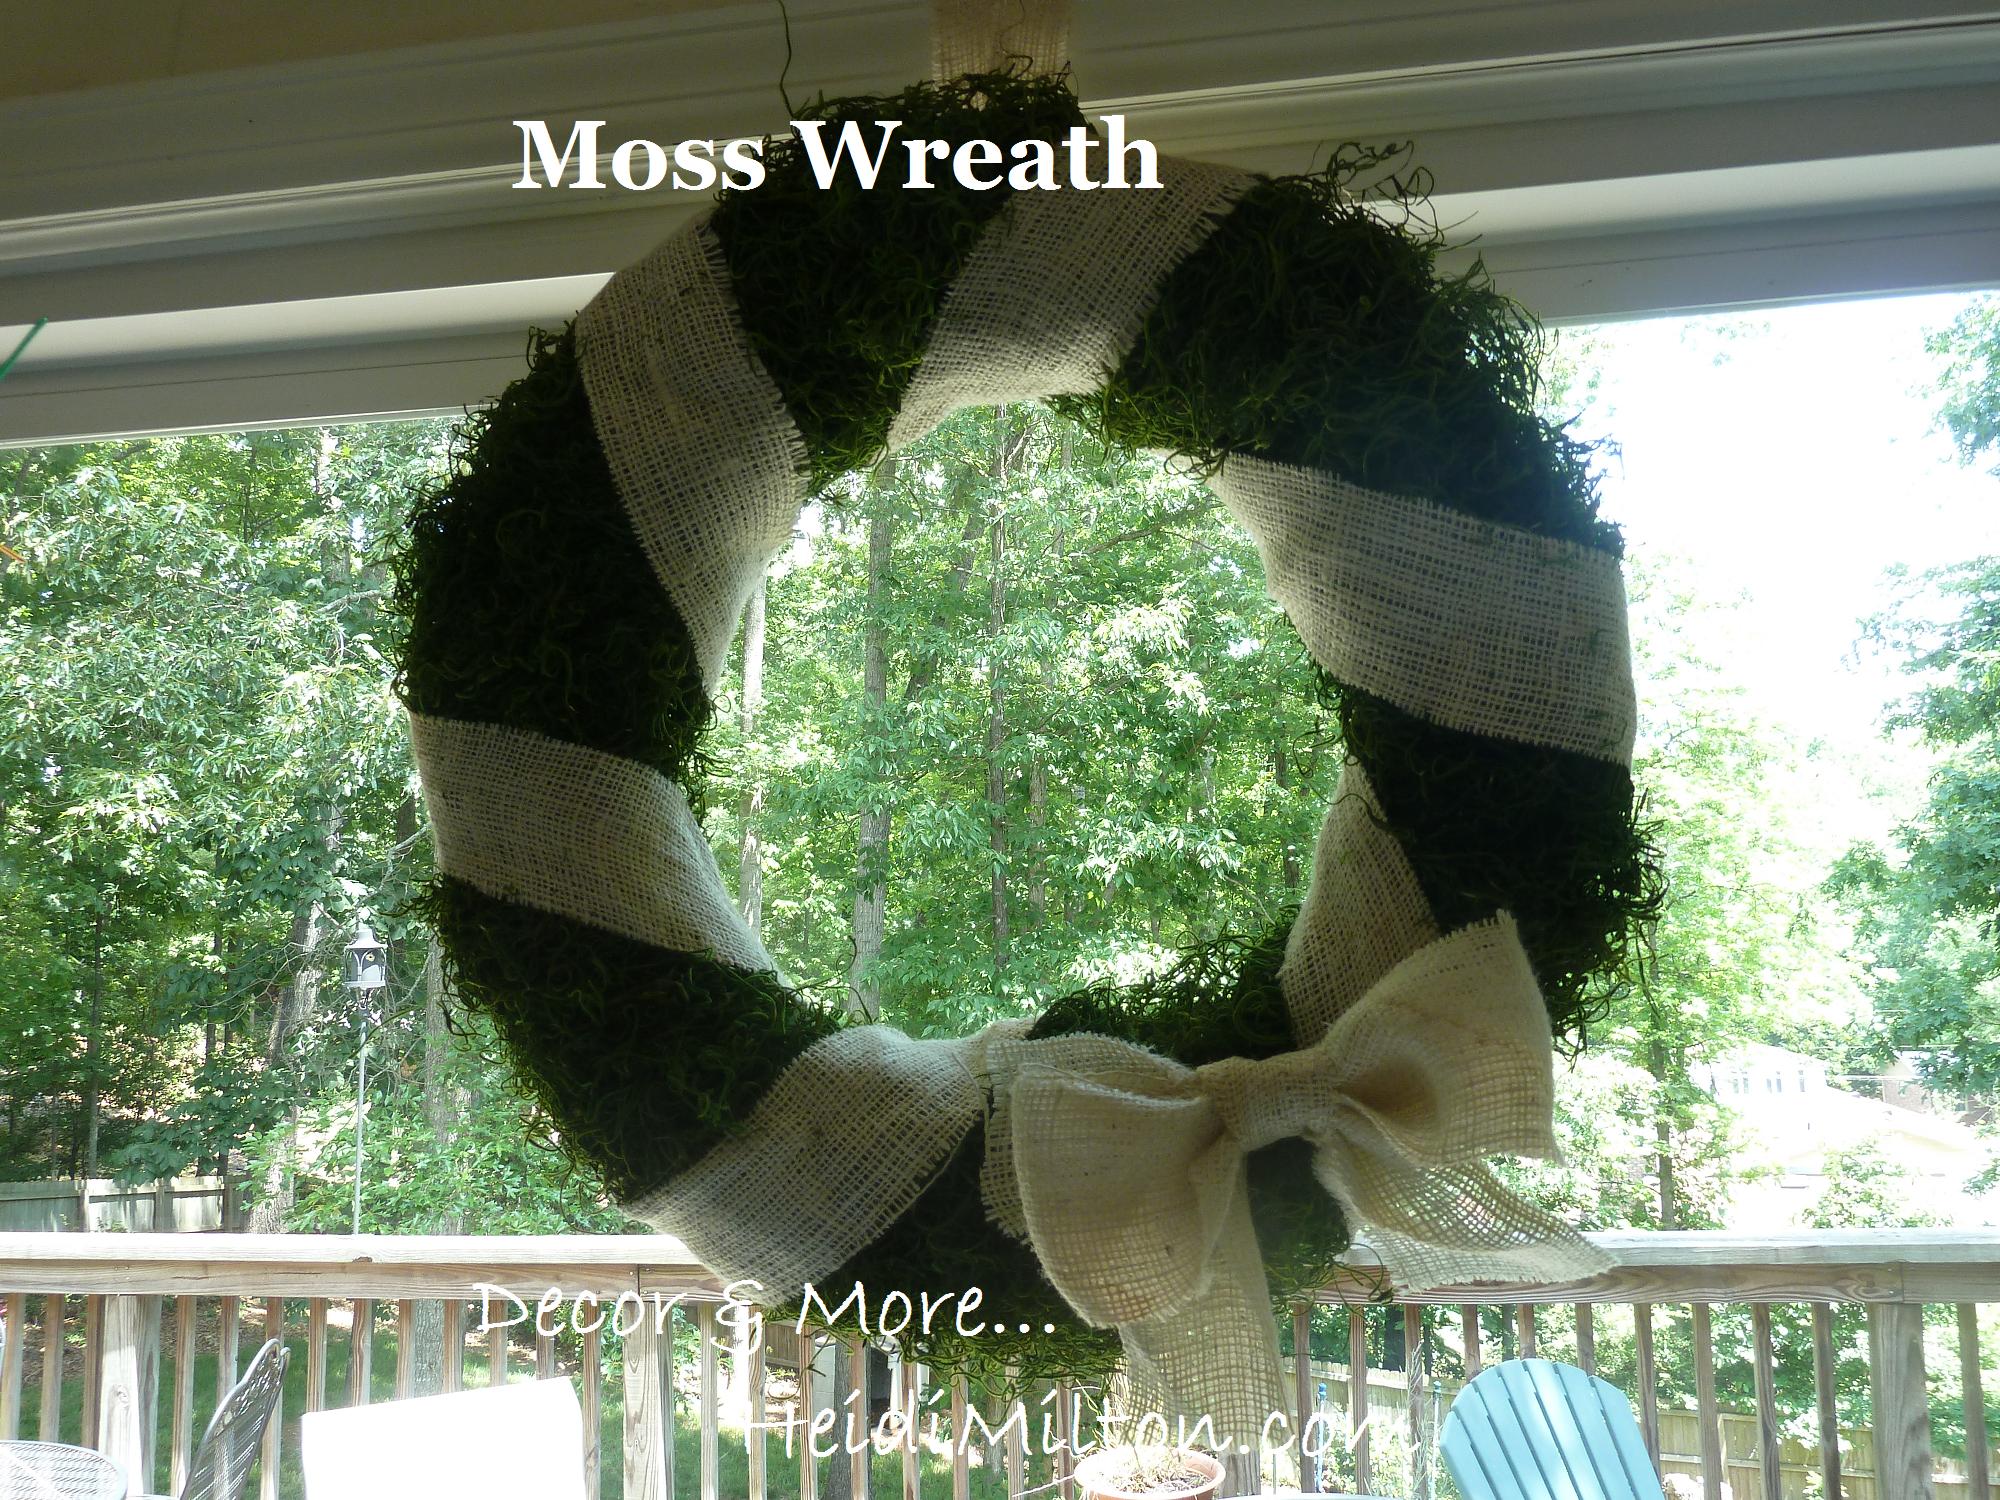
 Kacey's blog was one of the first blogs I started reading and I love her creative spirit, so I'm thrilled to be hanging out over here with y'all. I thought I'd share one of my favorite DIY's to date -- my Moss & Burlap wreath. I made this last spring, but it's hung around (literally) in different rooms of my home ever since. I think it would super simple to tweak for the holidays, too. So here's the how-to!


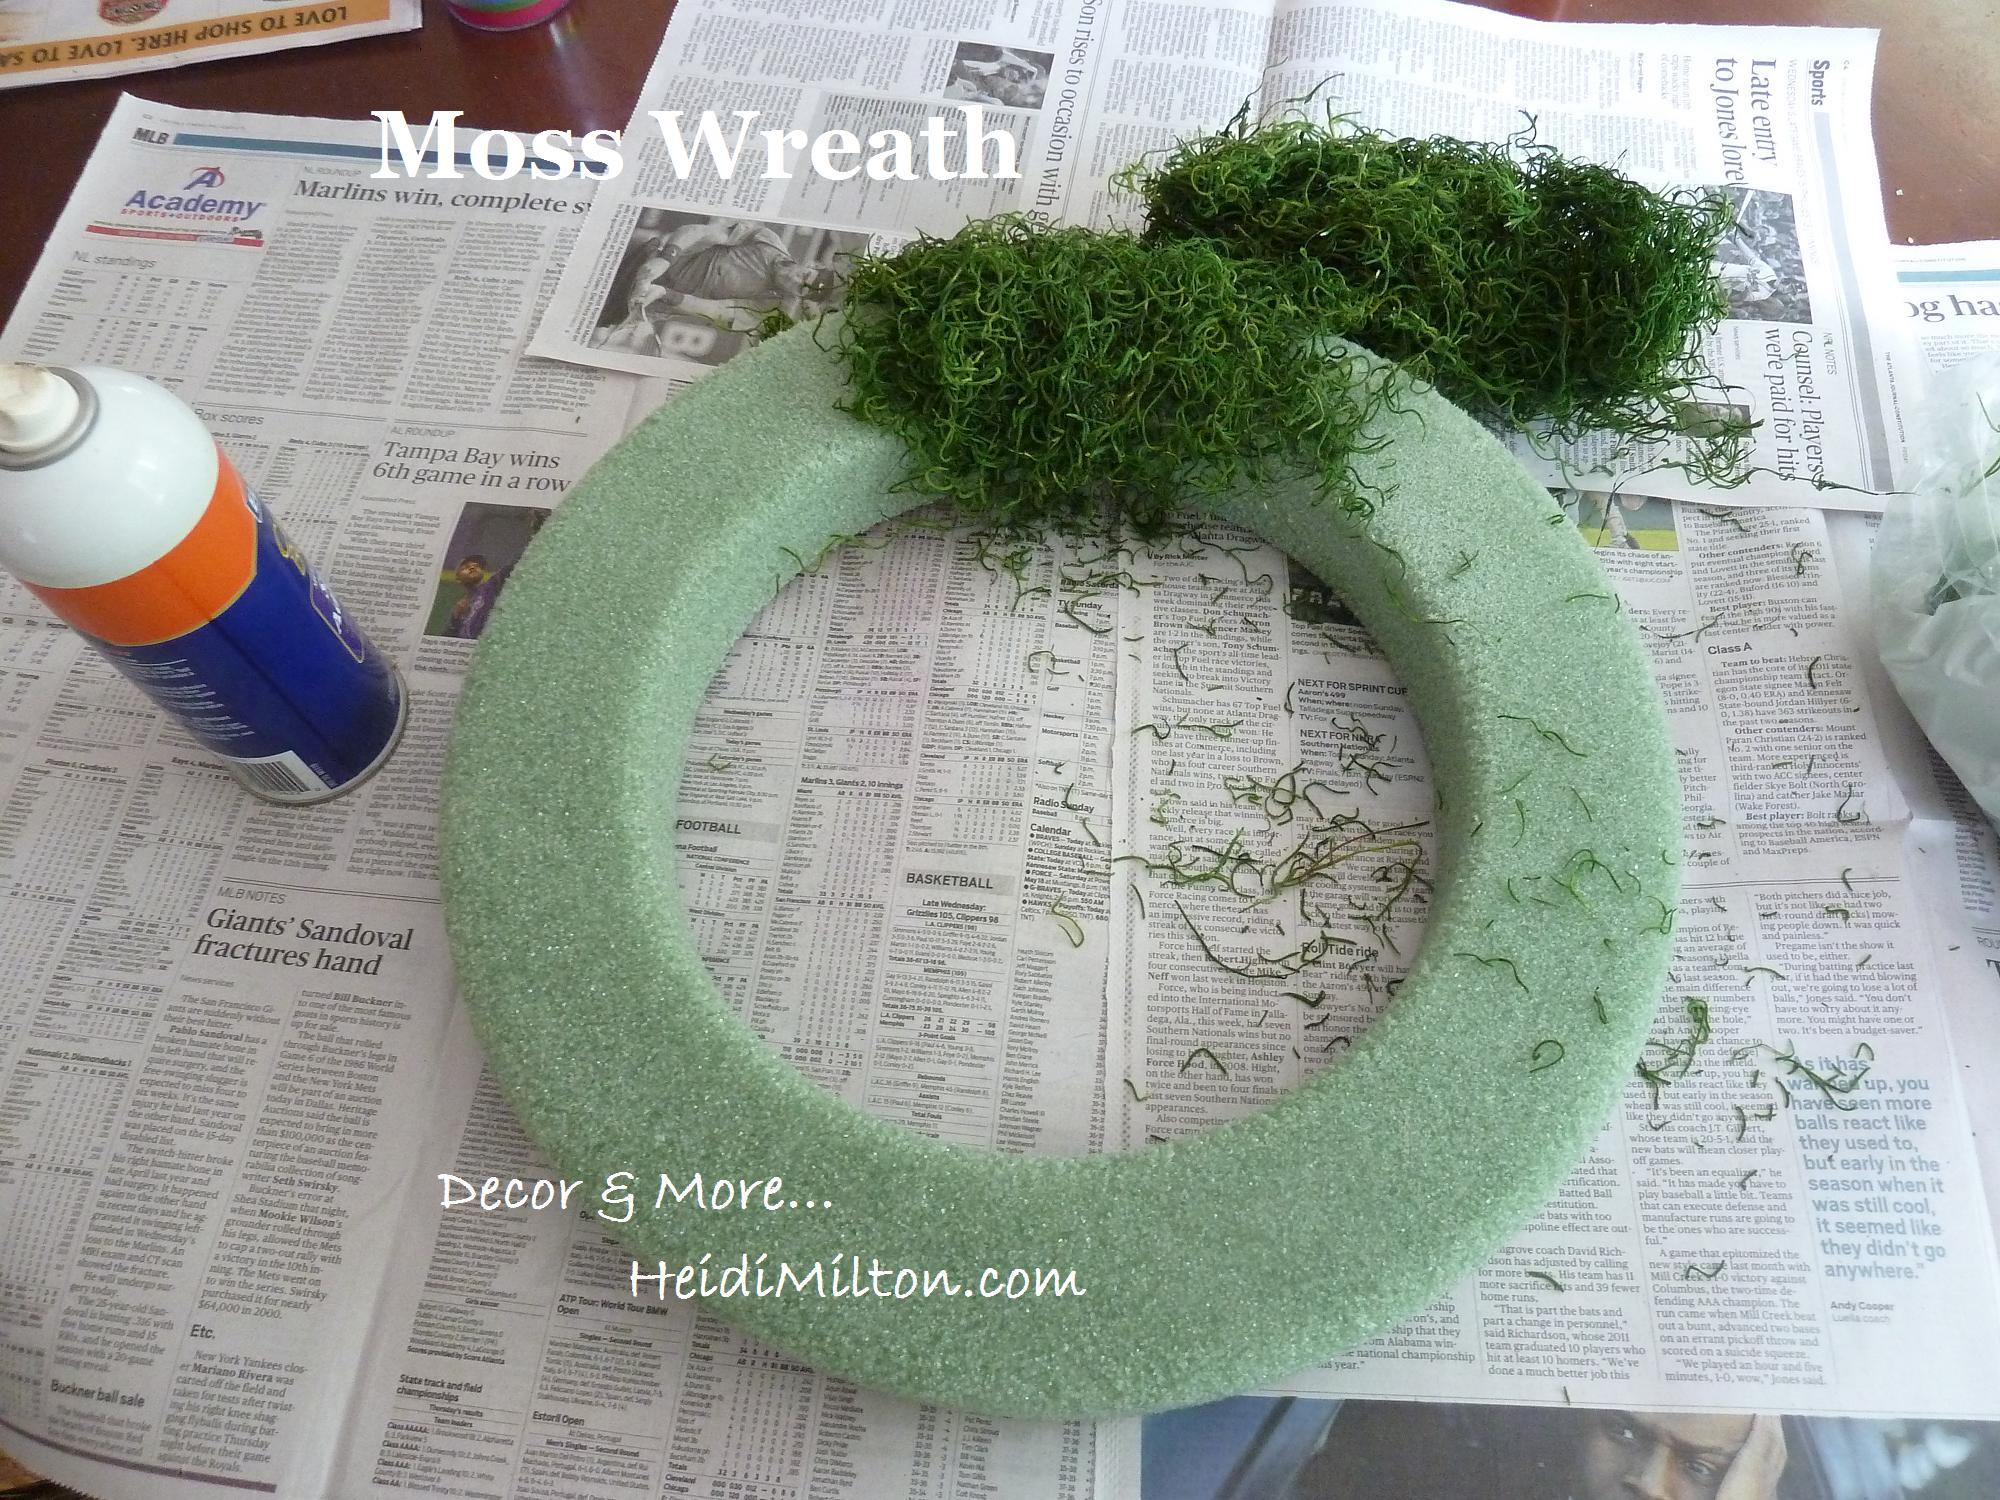
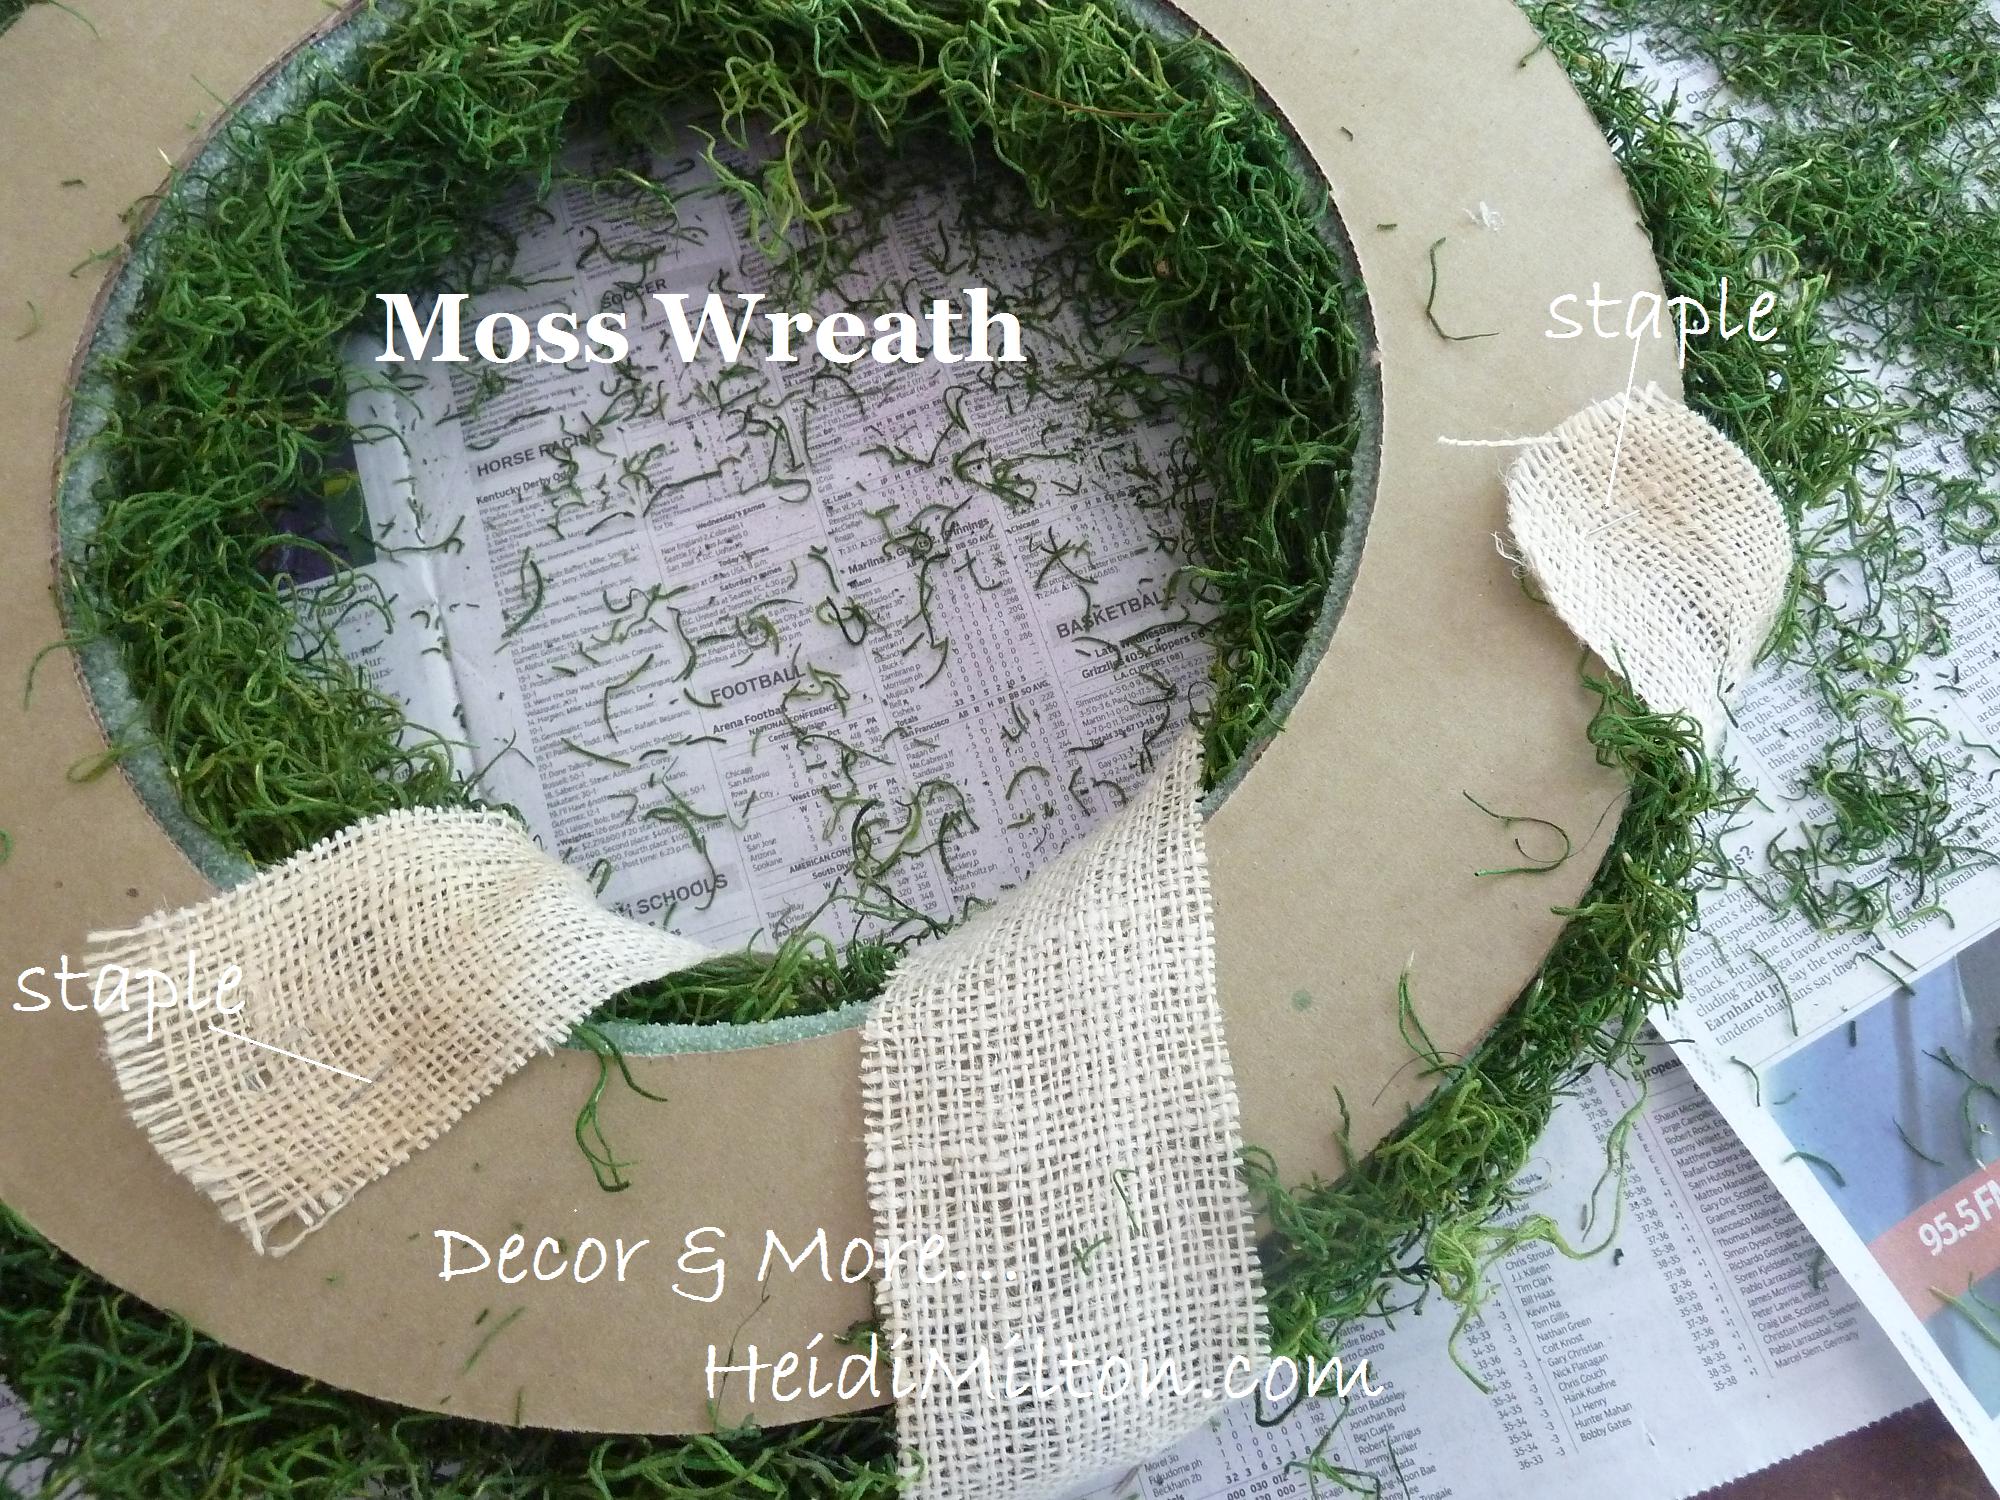
 I gathered up a few things I had laying around from other projects: a wreath form, moss, spray adhesive, and burlap scraps that I cut into strips (a poor girl's version of burlap ribbon!).


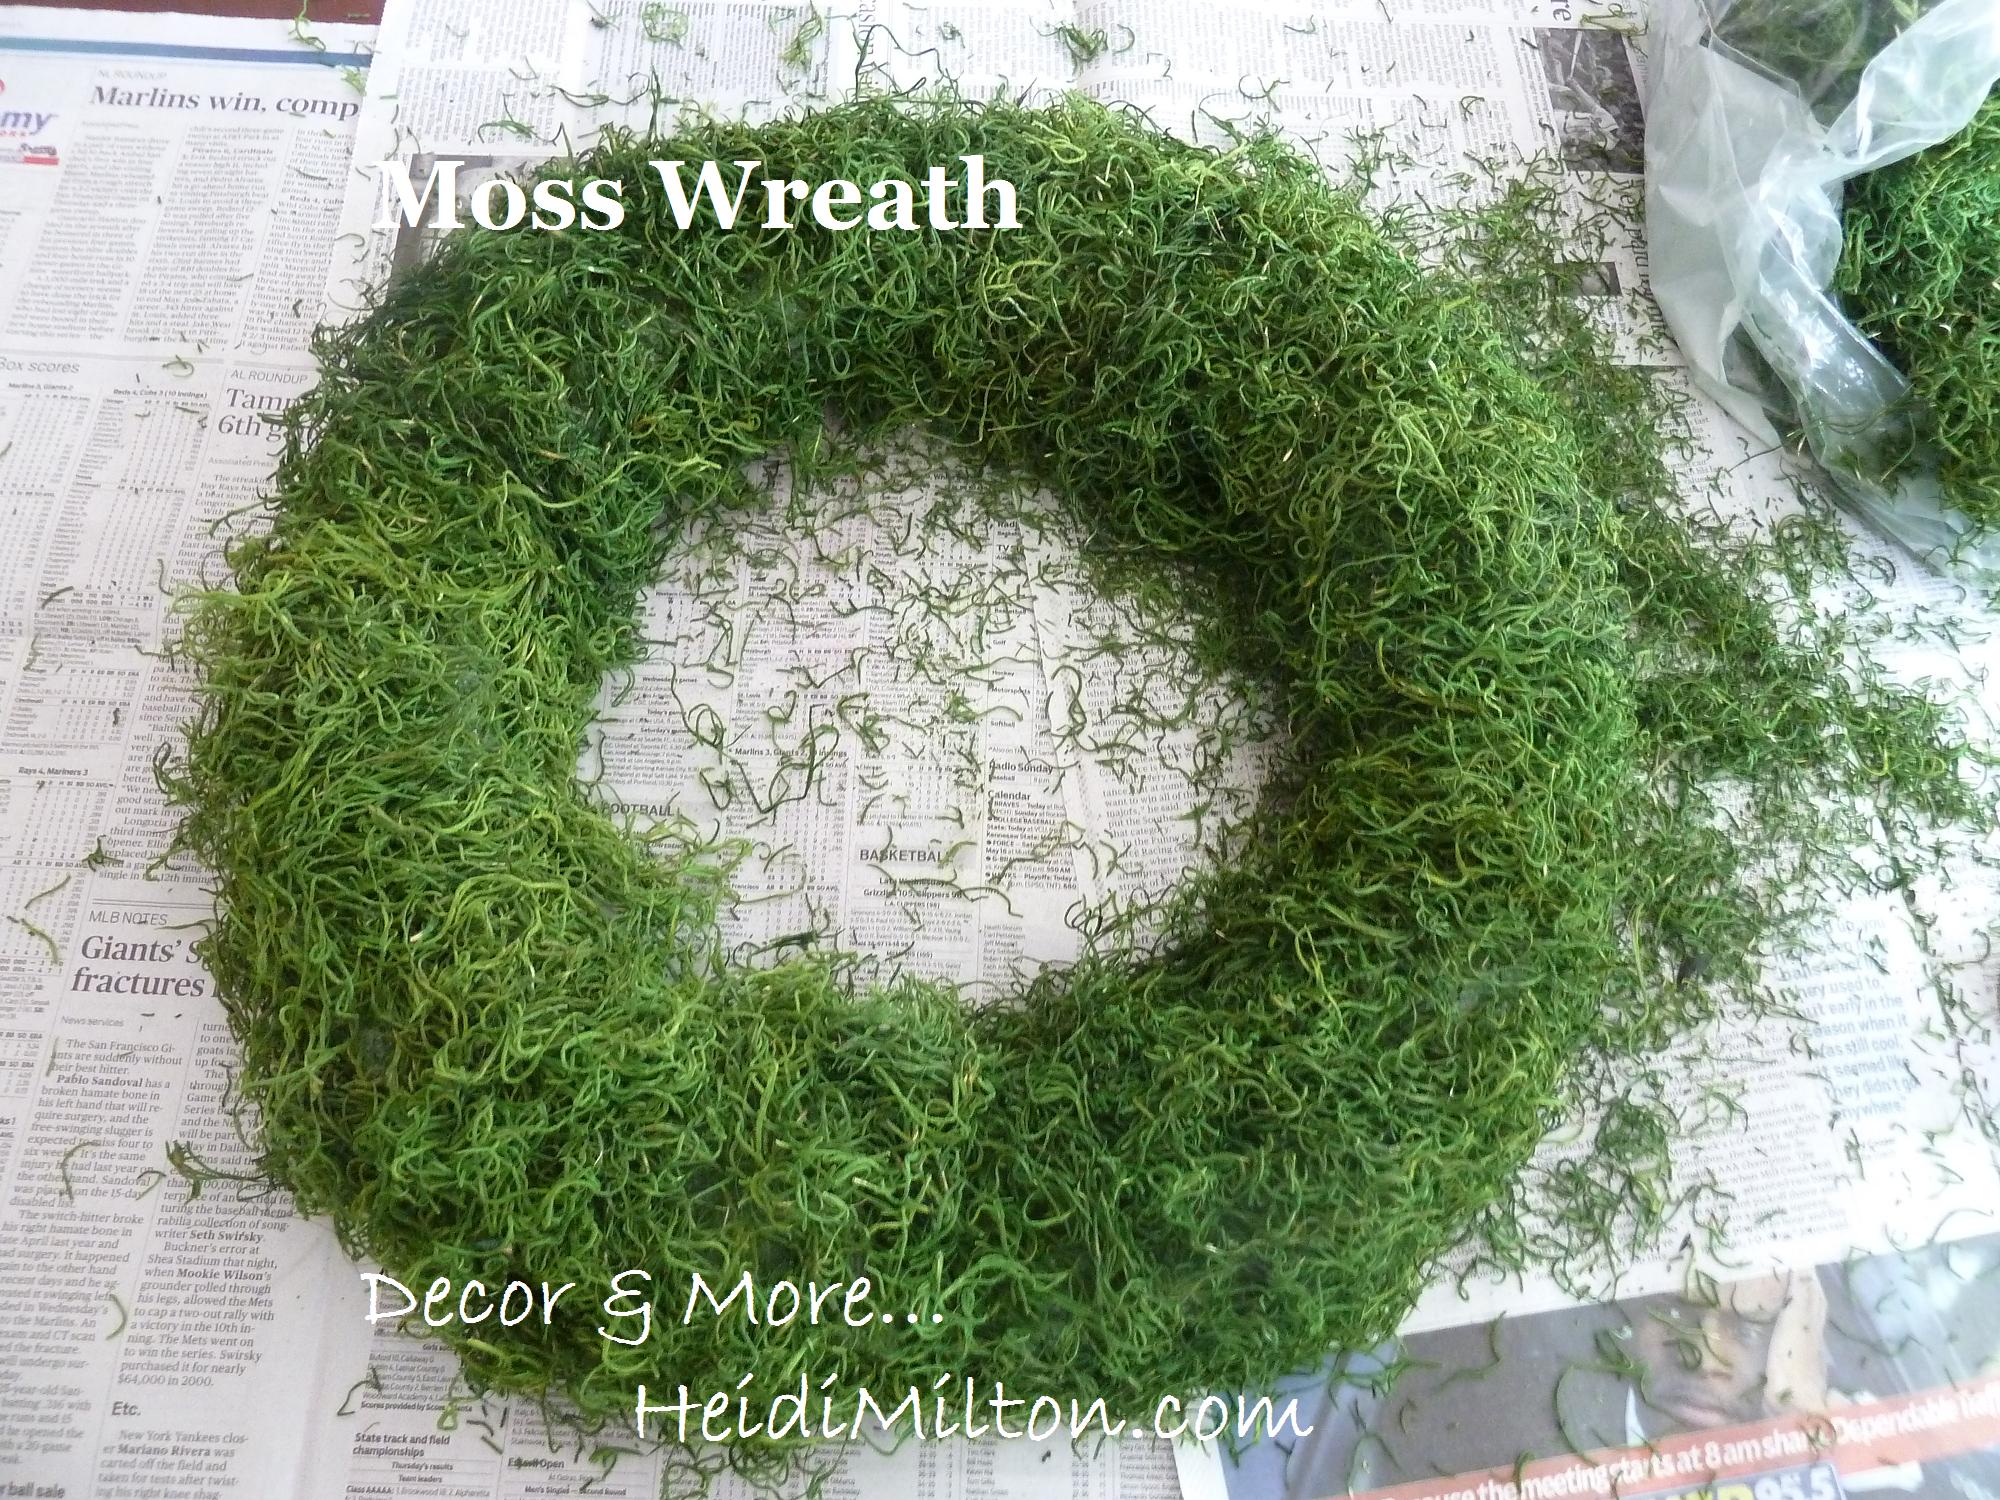
This part was super easy. I simply sprayed my Elmer's Spray Adhesive in small sections and pressed the moss into place once the adhesive became tacky. The hardest part was containing the mess that little bits of the moss made.


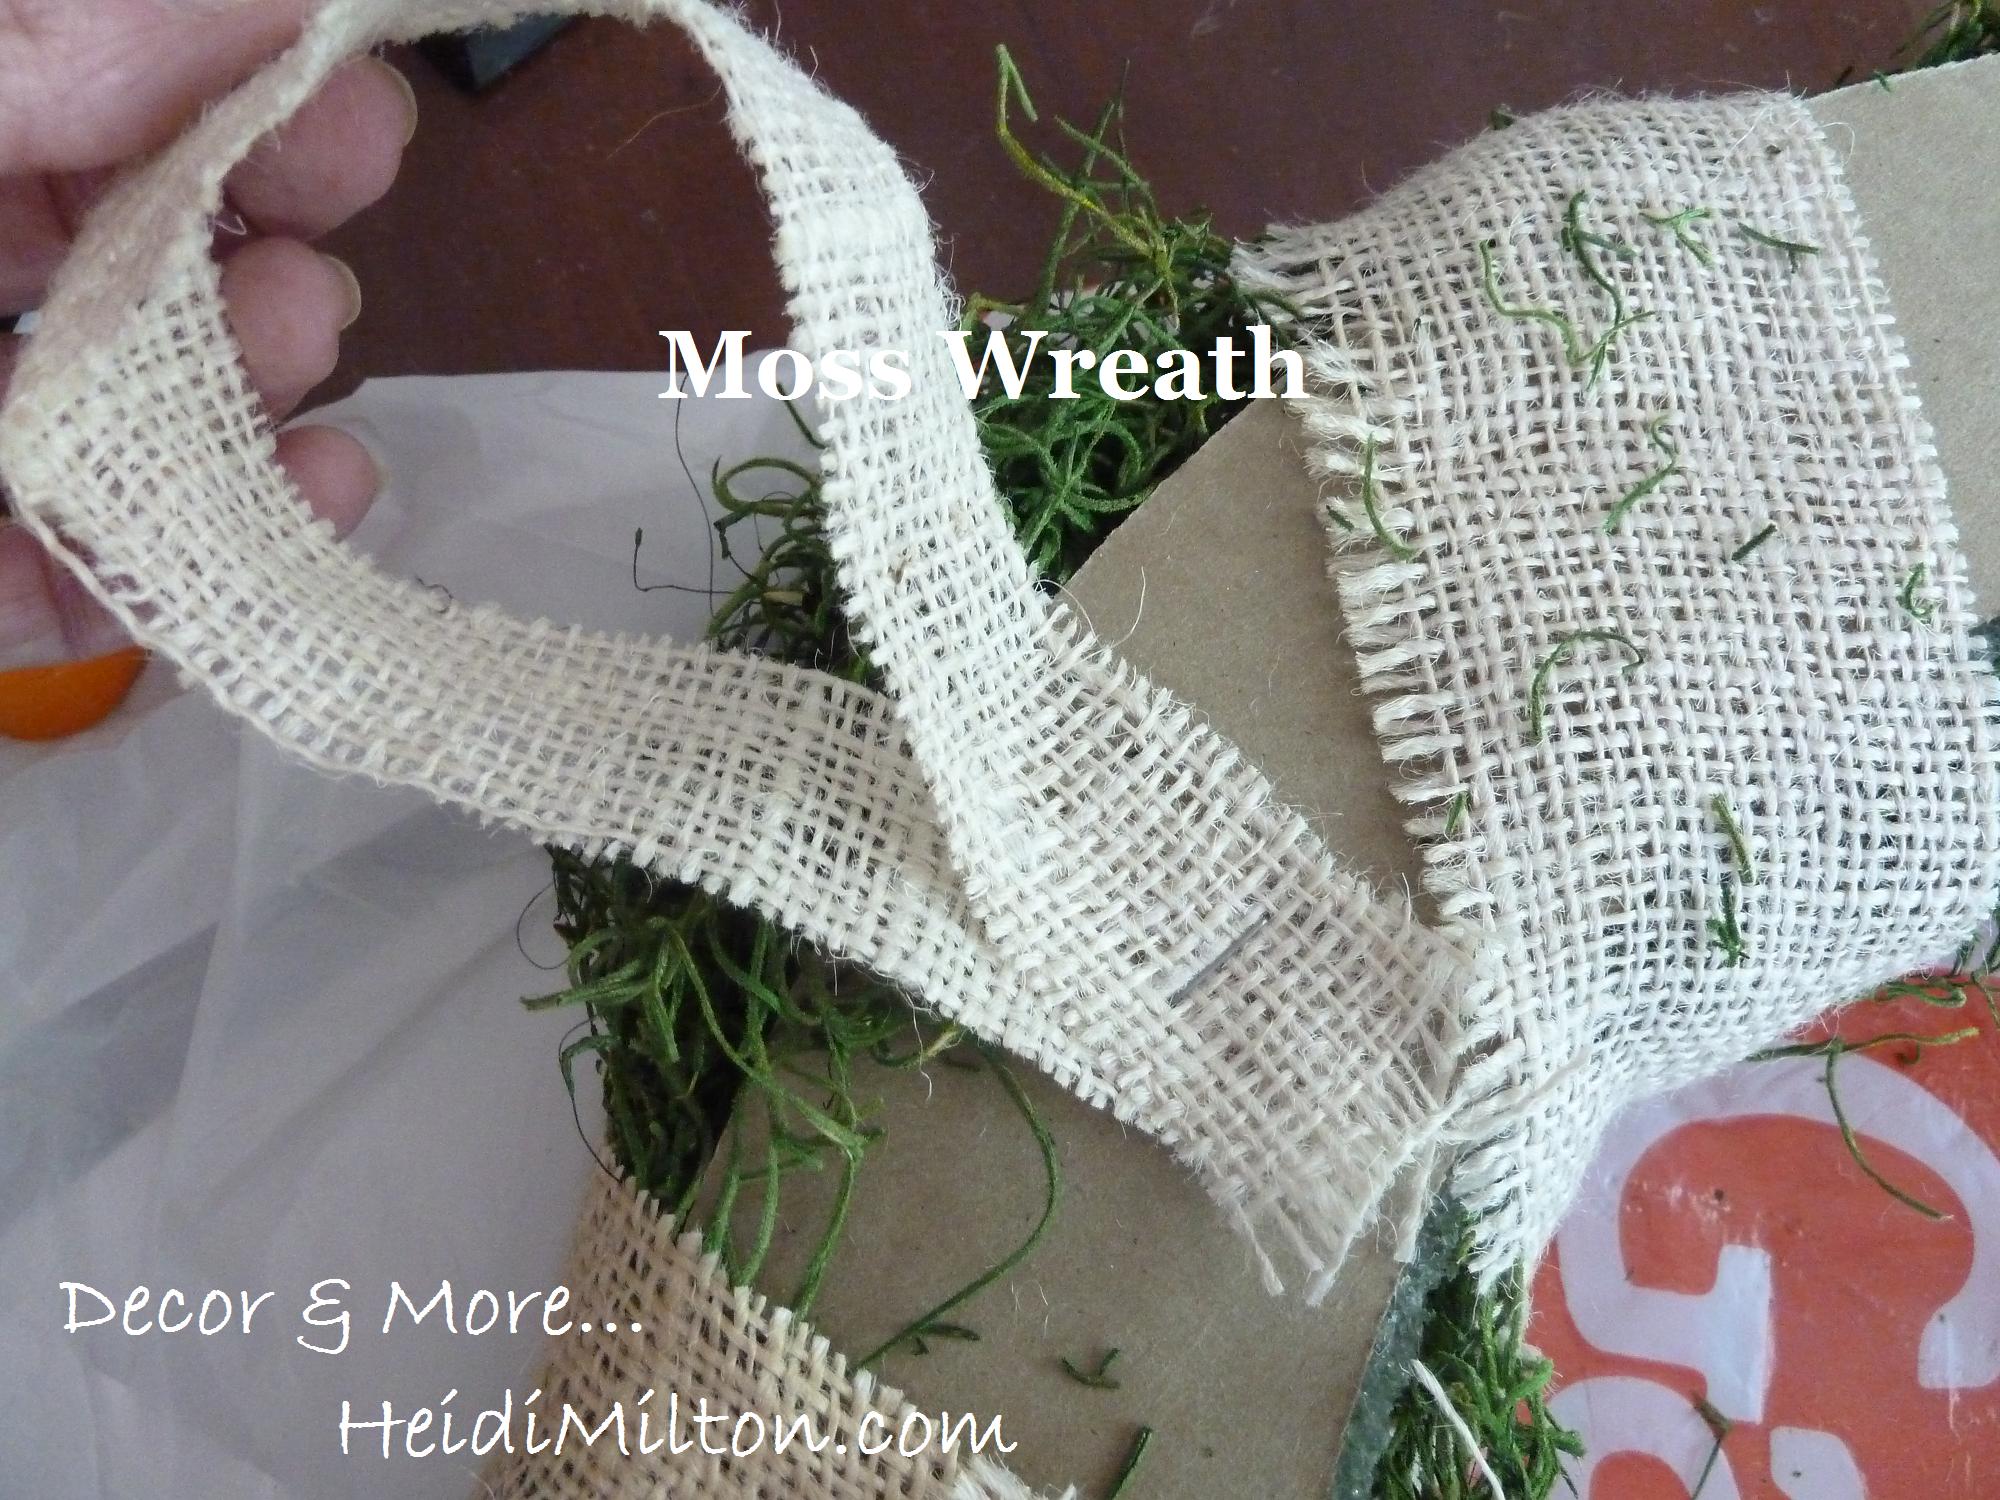
Once it's entirely covered, you made need to beef up your moss in a spot or two. See the mess I made? :) I let everything set for about 15 minutes after I finished applying the moss. Then I started working with my burlap strips. Because I cut these from scraps, each one is only long enough to wrap around the wreath once. So I stapled the ends into the backside of the wreath.


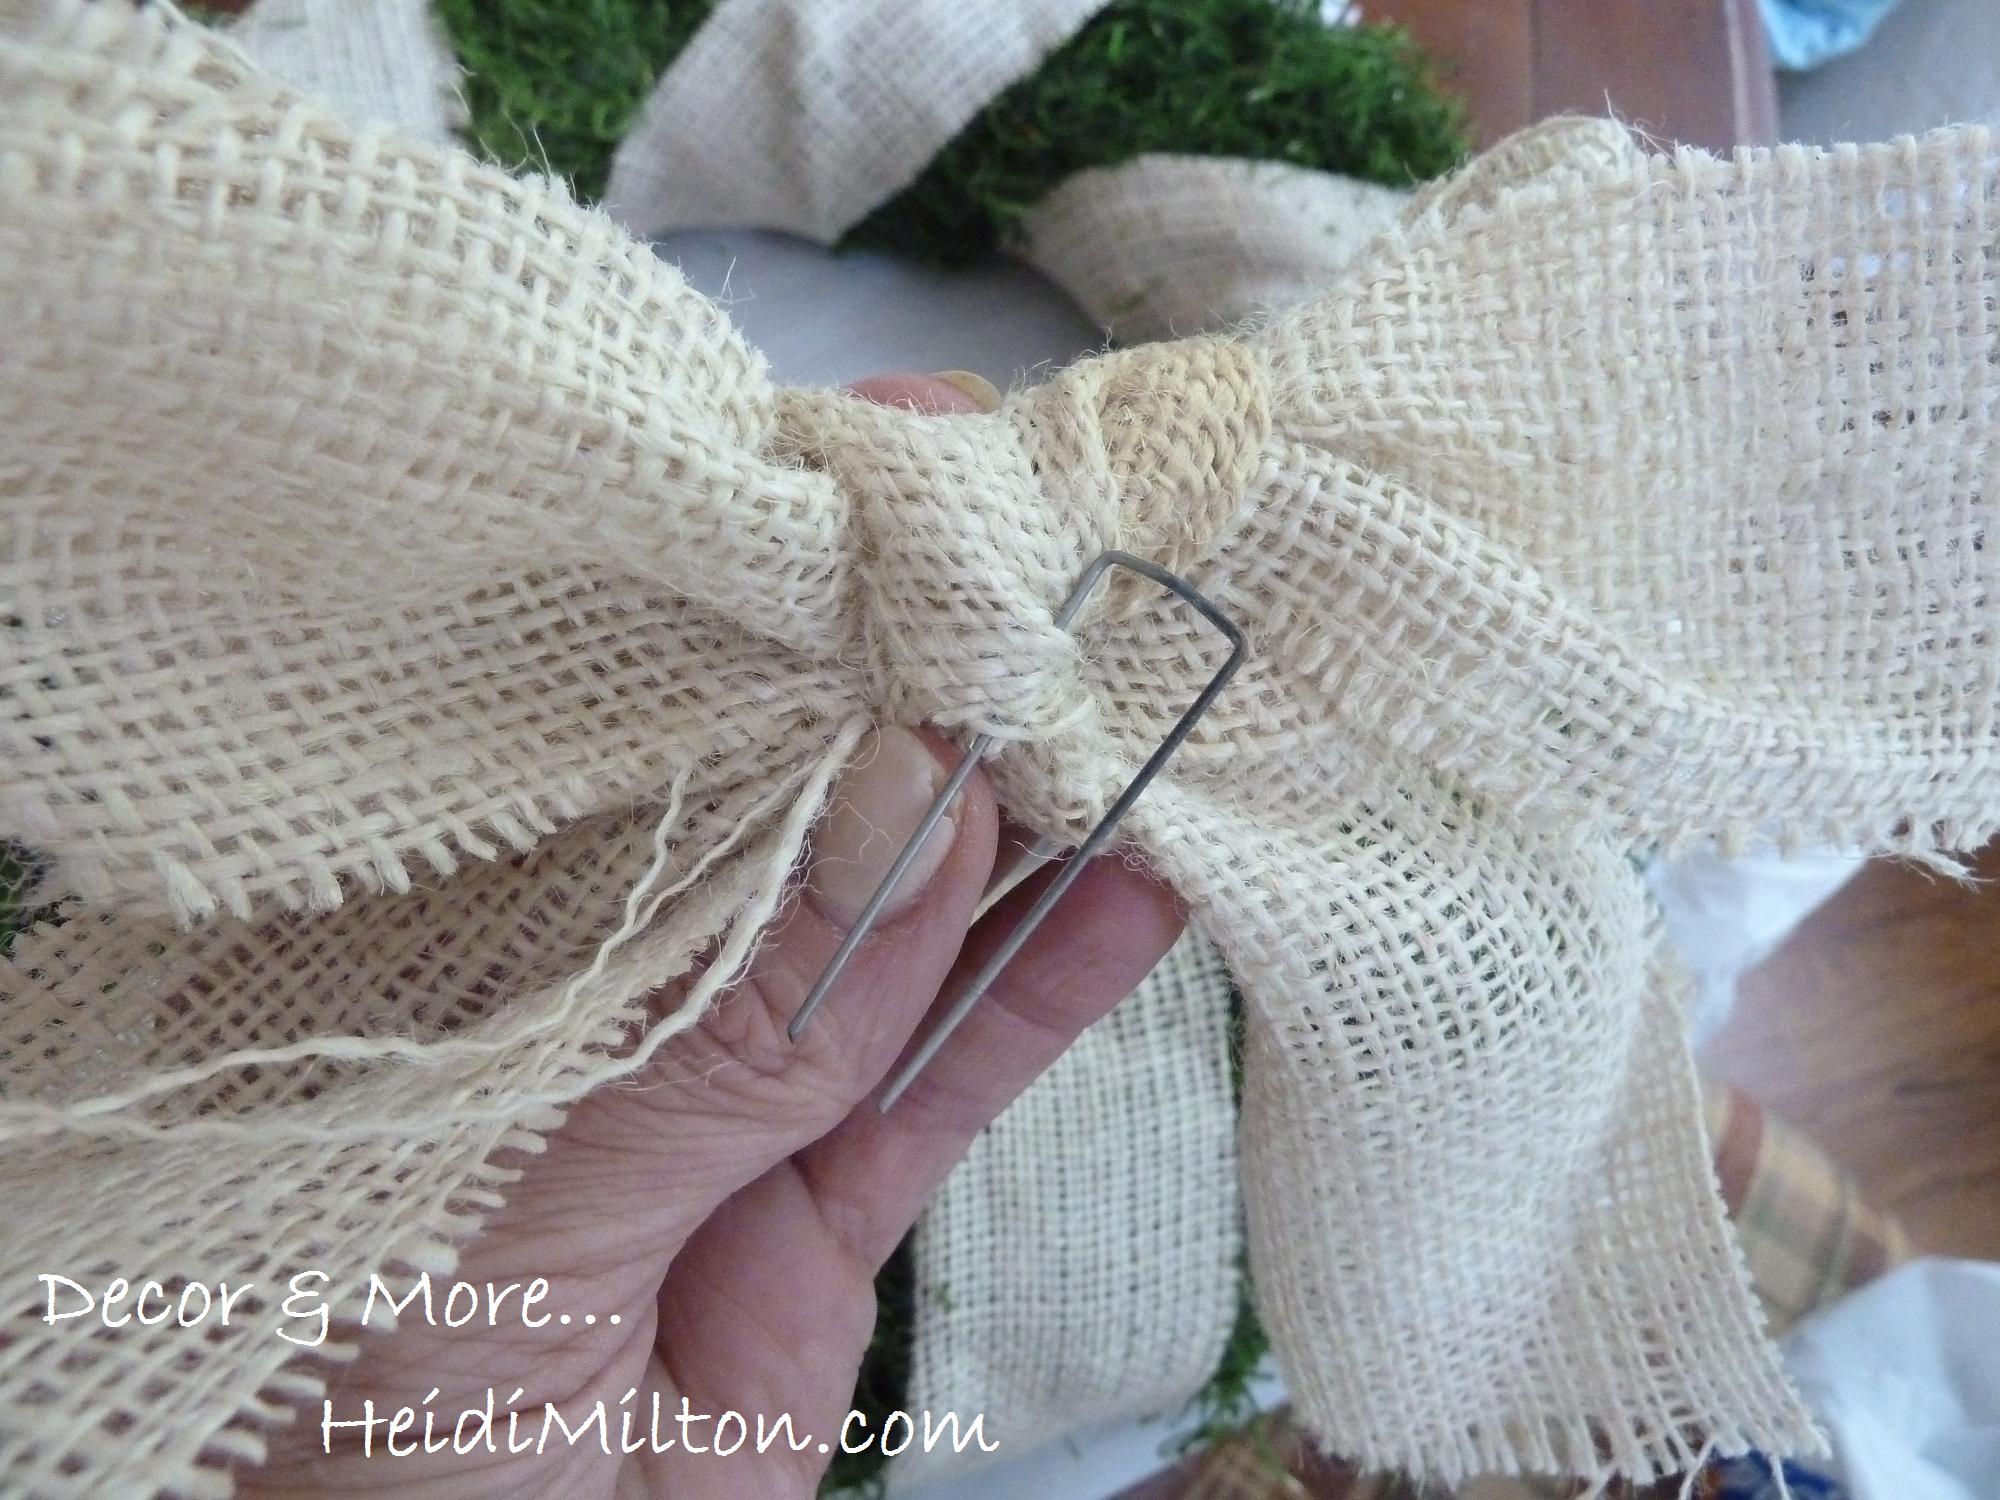
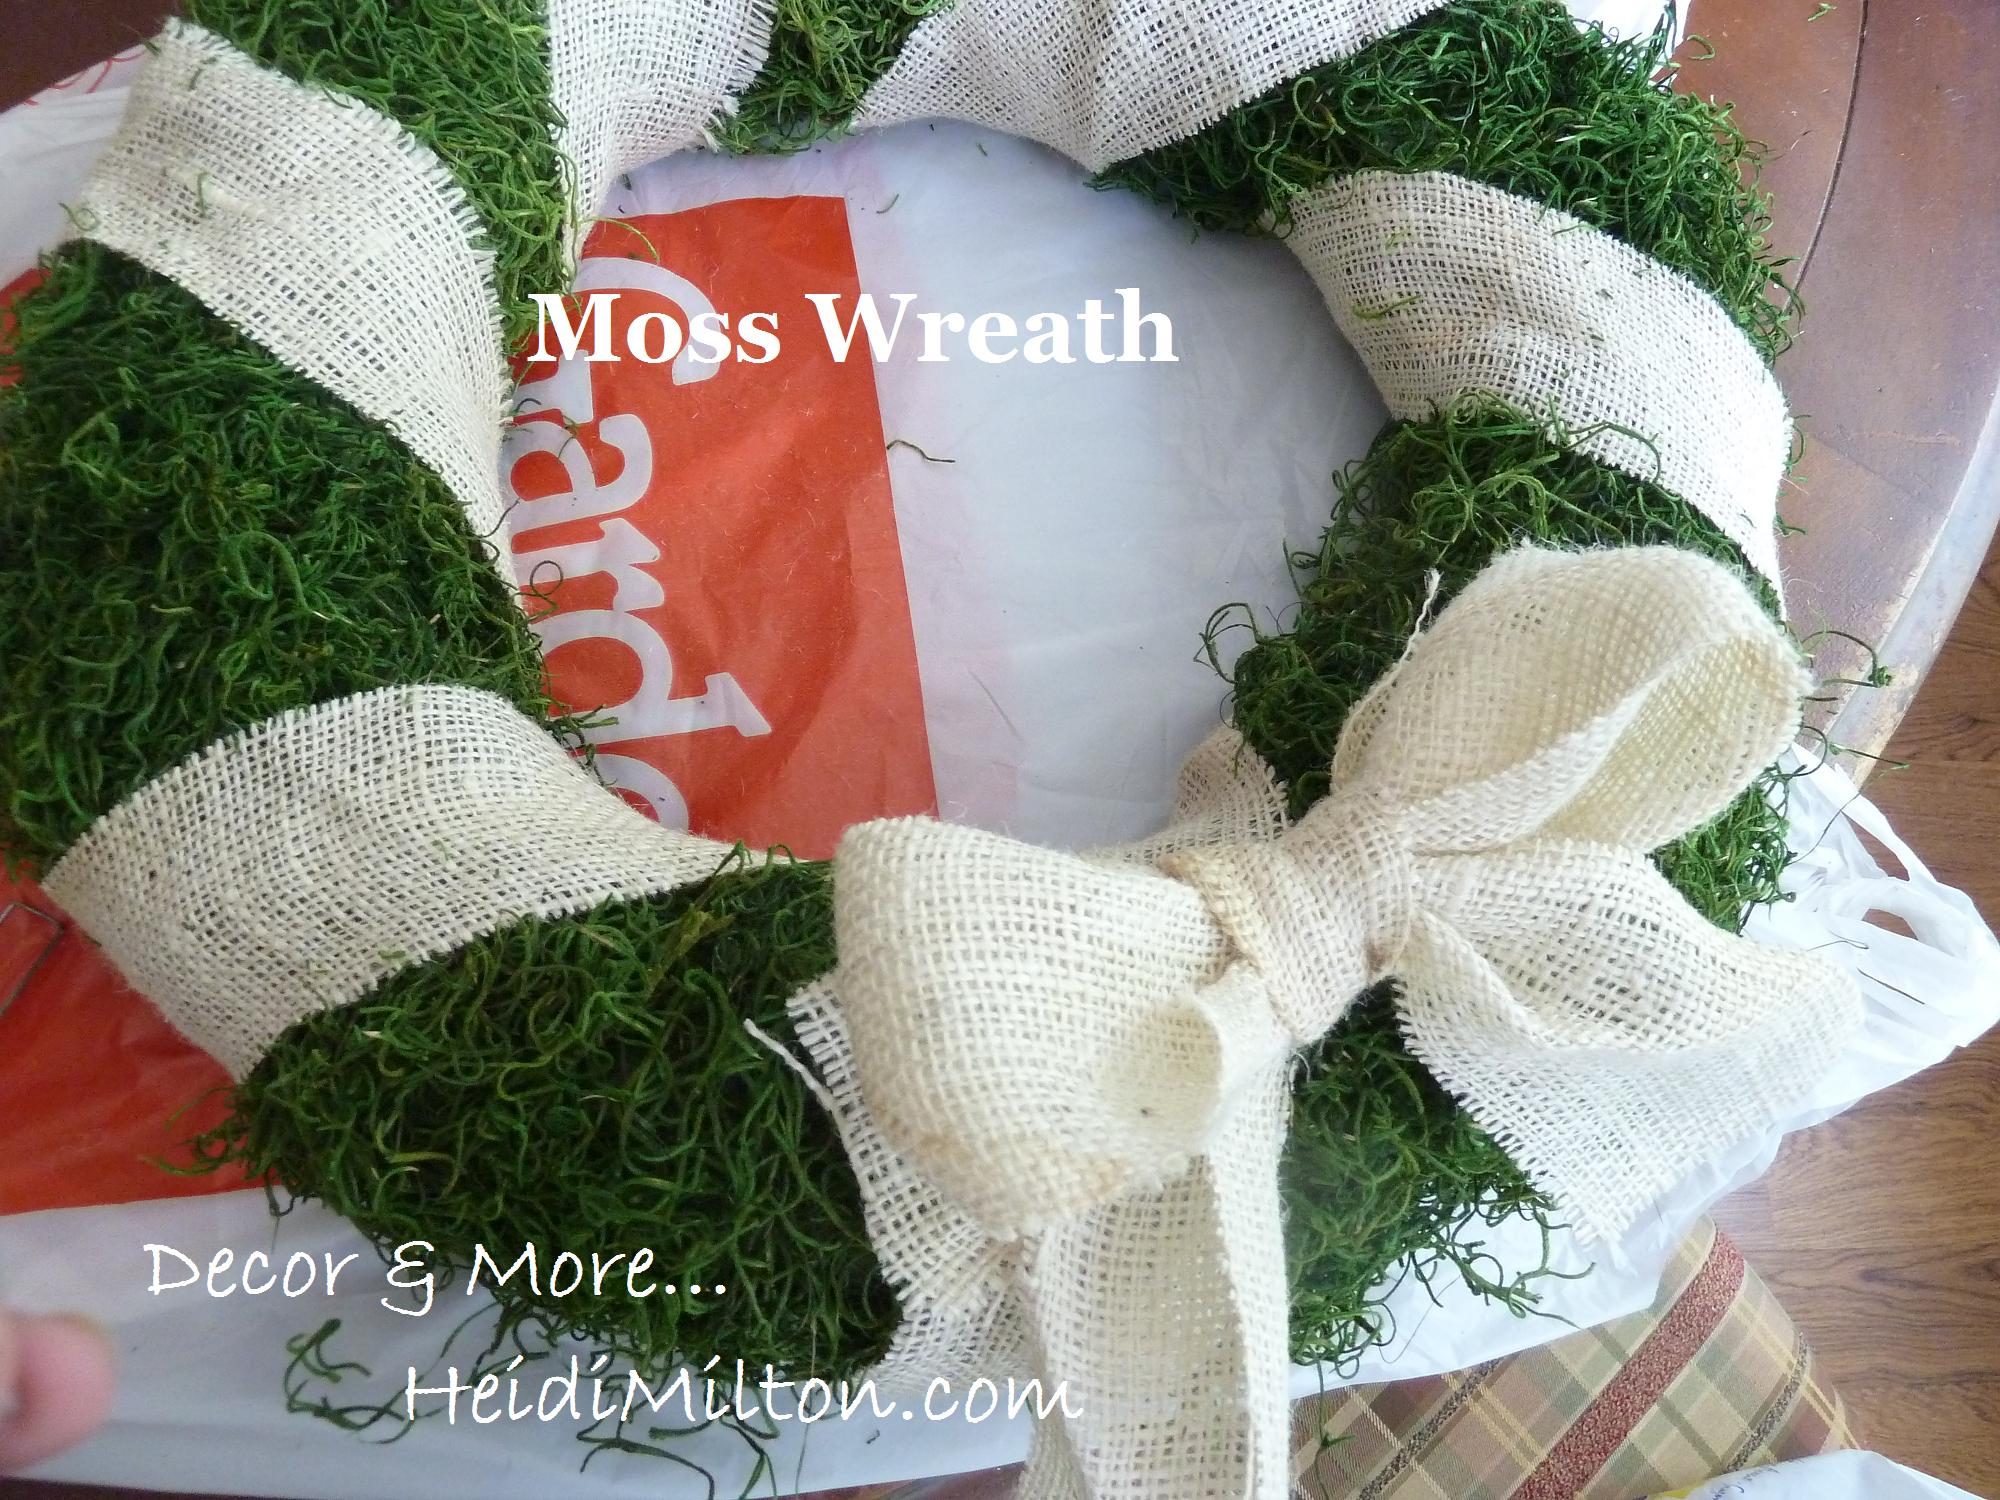
 If you're using a wreath form that doesn't have cardboard backing, you can secure your strips/ribbon with floral tacks. Again, I was using what I had on hand. Now, I knew I wanted a burlap bow on this. So I looked up tutorials on Pinterest. Trouble is, the only ones I found were for burlap tibbon. I was dealing with burlap strips, so all the tutes I tried were utter failures. I resorted to a very simple bow. The simplest of bows. Then I stuck a tack in it.


And stuck it on the wreath, making sure it went into the styrofoam.


 I used another strip to make a loop on the back for hanging.


You can see how I roll. Easy peasy.


 I'd love to hear from you if you give this project a try! Come visit me at Decor & More anytime... you can also find me on Pinterest, Facebook, and Twitter (@heidimilton). Thanks, Kacey, for having me!! Happy wreath-making!
     

Wednesday, April 13, 2011

butterfly wall hanging tutorial...

I'm so excited to share my Butterfly Wall Hanging today!


I created this project as part of "All About Easter"...so welcome to all of you who popped over from Kiki Creates!  (And the rest of you should really check out the other posts if you haven't already...all kinds of Easter goodness going on over there.)


blog button final  
 
Keeping with the butterfly theme I've got going this year, I wanted to add something bright and cheerful to my spring/Easter decor.  And this little beauty is so easy and inexpensive to make.  To create one of your own you'll need:


a photo frame
craft paint/paintbrush or spray paint
mod podge
butterfly images
an xacto knife
scissors or a paper cutter
a page from an old book
wire
wire cutters/pliers
hot glue
a marker
scrapbooking tape
 
I actually had all of these things on hand, except for the frame which I picked up at the dollar store.  Doesn't get much cheaper than that!
 
Now you might be thinking, "She just happened to have some vintage butterfly illustrations on hand? Rii-iight."  
 
Well, no. But I do have the internet and a color printer.  Vintage Printables is a sweet blog that has galleries of all kinds of vintage illustrations available to the public domain.  I'd recommend starting there and printing butterflies in various sizes that fit your color scheme.

Okay, so once you have your images printed and all of your supplies gathered, start with the photo frame.  Remove the backing and glass--we won't be using those--then pull out the little metal bendy things that hold the back on.  (I don't know what those are called, but hopefully you know what I'm talking about.)


Next, paint your frame the color of your choice.  
I went with turquoise. (Shocking, I know.)


It was too crappy outside to spray paint, and I wanted some of the original silver to show through... so I painted mine kind of streaky, but you do yours however you want.  (Or use a frame that's already the color you want and skip this step altogether!)


While your paint dries, use an xacto knife to cut out your butterflies.  
(I like to save the cardboard backs of notebooks and pads of paper to use as a cutting surface.)


Then, give your frame a top coat of mod podge to prevent the craft paint from scratching or flaking off.  (Skip this step if you spray painted.)


While that dries, cut 2 lengths of wire to fit the dimensions of your frame.  
(My frame is 8 x 10, so I cut my wire 10 inches long.)  


Also decide what word you'd like to use--spring, Easter, your last name, etc.--and cut out the appropriate number of squares from your old book page.  (I cut 6 squares that were about 1.25 inches.)  Use a marker to write each letter--or use a die cut machine to cut out letters if you're not a fan of your own handwriting.


Once your frame is dry, attach your wires to the inside lip of the frame with a dab of hot glue.  (When placing your wires, make sure to account for the size of your butterflies.  You will probably want to lay out your design first.)


See how one wire is much closer to the edge?  
Had to leave room for my largest butterfly.


After your wires are attached, lay out your whole project upside down. Use scrapbook tape to attach all of your paper elements to the wires.  The tape is sticky enough to hold all of the pieces in place, but also allows you to slide things around a bit if your spacing is off.


Lookin' good!


Now just tie a bit of ribbon to the top and hang her on the wall...


So bright and cheery!
I might have to change out my word to "summer" so I can keep it up longer.

(And wouldn't this also make a great decoration for a little girls room?  With her name..or just all butterflies?  Aww.)

Monday, April 4, 2011

daffodil wreath re-visited...

In case you missed it, I recently made a daffodil wreath.

And I hated it.

It wasn't necessarily a bad wreath, it just really didn't jive with my bright red front door.  Some of you gave me suggestions to improve it, but in the end I just had to think about a little color theory.  I was putting two saturated primary colors right next to each other.  What my wreath needed was some neutrals to temper those bright hues.  This is what I came up with...


Ta-da!  Much better, right?!
Less "Dr. Seuss" and more "Bright and Springy", which is what I was going for.
It doesn't require much explanation if you are interested in making one of your own.  First, I ripped all those daffodils off of my wreath form, but you are welcome to skip that step.  Haha.  Then I wrapped it in hemp cording, tacking it down with hot glue on the back every now and then (which added great texture as well as a neutral foundation).  I glued on a small grouping of daffodils and some aqua ribbon for a pop of color.  And there's a little pearly goodness on there, too...the pearls were on my craft table and the glue gun was hot.  What's a girl to do?  :)

Anyway...now I LOVE it!  Isn't it great when a second try yields better results that you imagined in the first place?  Lesson learned...

Monday, March 28, 2011

polka dot easter egg finials...


These Easter egg finials come together rather quickly and cost only a few dollars, but look like something you would pick up in the holiday decor section of any craft store.


Supplies:
paper mache (or wooden) egg forms
wood discs & dowel caps
craft paint in various colors
reinforcement labels
glue of your choice
mod podge (or other clear coat)

Begin by stacking your discs and dowel caps into configurations of various heights.  Once you get a look you like, glue the parts into place.  I used regular old craft glue.

Paint your wood bases white (or whatever color you choose), allow to dry, then glue your egg forms on top.  I used hot glue for this step.

Next, paint your eggs.  I purposefully waited to paint them until they were glued to the bases since they have round bottoms.  That way I didn't have to hold them awkwardly while trying to paint.

At this point, you could decorate them anyway you can think of--ribbon or scrapbook paper stripes, die-cut shapes, stencils, lace, trim, cute masking tape.  The possibilities are endless.  I'm a sucker for a cute polka dot, though, so I went that route.  And I used reinforcement labels to make the job a little easier.

Start by sticking a bunch of those little circles to your pants.  Yes, your pants.  You don't want the adhesive to be too sticky or it will pull off your base coat of paint.  By sticking them to your clothing, the labels will pick up tiny fibers and become less sticky.

Next, place the labels all over your eggs as close together as your little heart desires.  Make sure the inner edges are smoothed down, but don't worry about the outer edges.

Paint the little circle inside of each little sticker white, then peel off while still tacky.  Repeat this process with each egg.  Once your dots are dry, coat each finial with mod podge to seal.  And that's it!


Spruce up a little shelf or table top vignette with your adorable eggs...
Happy Easter!
Related Posts Plugin for WordPress, Blogger...