Showing posts with label guest post. Show all posts

Wednesday, December 12, 2012

guest post: DIY stacked bows {by Sunny Tuesday}

Hey there!  My name is Jessica and I blog at Sunny Tuesday.  I am thrilled to be here today, sharing a great tip with you on expanding your daughter's BOW-drobe!


If you have a little girl, you know it is essential to have a hair accessory for every outfit!  All those different clips & headbands can add up to a lot of space and money.  Why not work with what you have to create fun, new combinations?

Any bow with a straight ribbon (not knotted) center will work as your base bow.  Then you want to find a smaller bow or clip to put in the center.  In the above example, I clipped a simple boutique bow to a fancier bow.  Two clips, three ways to wear them!

My daughter can wear this orange & white bow alone, or with a felt clip or ribbon sculpture (which can also be worn alone).  These 3 clips can be worn 5 different ways!


A couple of different sized coordinating bows and clips would make a wonderful & thrifty Christmas present!  The perceived value will almost certainly be more than the price tag. :)  

Don't forget to pin this idea - you'll want it for later!


Wednesday, December 5, 2012

guest post: glitterblast typography christmas tree {by Sumo's Sweet Stuff}

Hello everyone!

I’m Sumo, or Summer if you wanna get formal.

profile

I blog over at Sumo’s Sweet Stuff.

Button1

It’s my little place in the blogging world where you can come to find sewing and crafting inspiration. Sewing is my favorite creative outlet, but I’m not afraid to bust out the Mod Podge and paint when the mood strikes. You might also catch me professing my love of Target (or the popcorn store as we call it), talking about my relationships with Lucy (Cameo) and Veronica (sewing machine), or bragging about my three beautiful girls. I have an extreme fondness for Diet Coke, my minivan, historical fiction, and most sweets.

Here is a fun little Christmas craft to get you in the holiday spirit: glitterblast typography Christmas tree!


I'd seen this image on Pinterest (come follow me!) and I had been wanting to re-create it for my house for this holiday season.

Pinned Image

Here's what you need:

- wood (mine was cut to 12x12)
- Krylon Glitterblast sealer
- paint
- paint brush
- vinyl
- transfer tape
- Silhouette or other digital cutter (Lucy!)


Start off by sanding your wood piece and painting one side whatever you want for your base color. Mine was just a metallic white. (I originally tried to do this using a canvas, but my vinyl wouldn't stick to it!) Set this aside to dry.


Create your design in your digital cutter's software. The font I used is called Antelope.


I used Lucy to cut it out on vinyl. It doesn't matter what color; you are only using it as a stencil. Peel up the negative space.


Cut a piece of transfer tape and adhere it down over your vinyl.


Peel up the transfer tape and position your vinyl where you want it on your wood piece. Use a pan scraper or popsicle stick to rub the vinyl down.


Carefully peel up your transfer tape, making sure none of the vinyl is peeling up with it.


Use your glitterblast paint to coat that baby! Let it dry.


Peel up your vinyl.


Spray your decoration with the sealer to help keep the glitter on there.

Done!


Now display your project with pride!


To be honest, I kind of wish that I had done something with more contrast, like red.

But I still think this will look really pretty, shimmering by the glow of the Christmas tree lights, don't you?


Aren't you getting excited for Christmas? It's my favorite! (Just like smiling).

Come visit me over at Sumo's Sweet Stuff! Thanks for having me! 


Monday, December 3, 2012

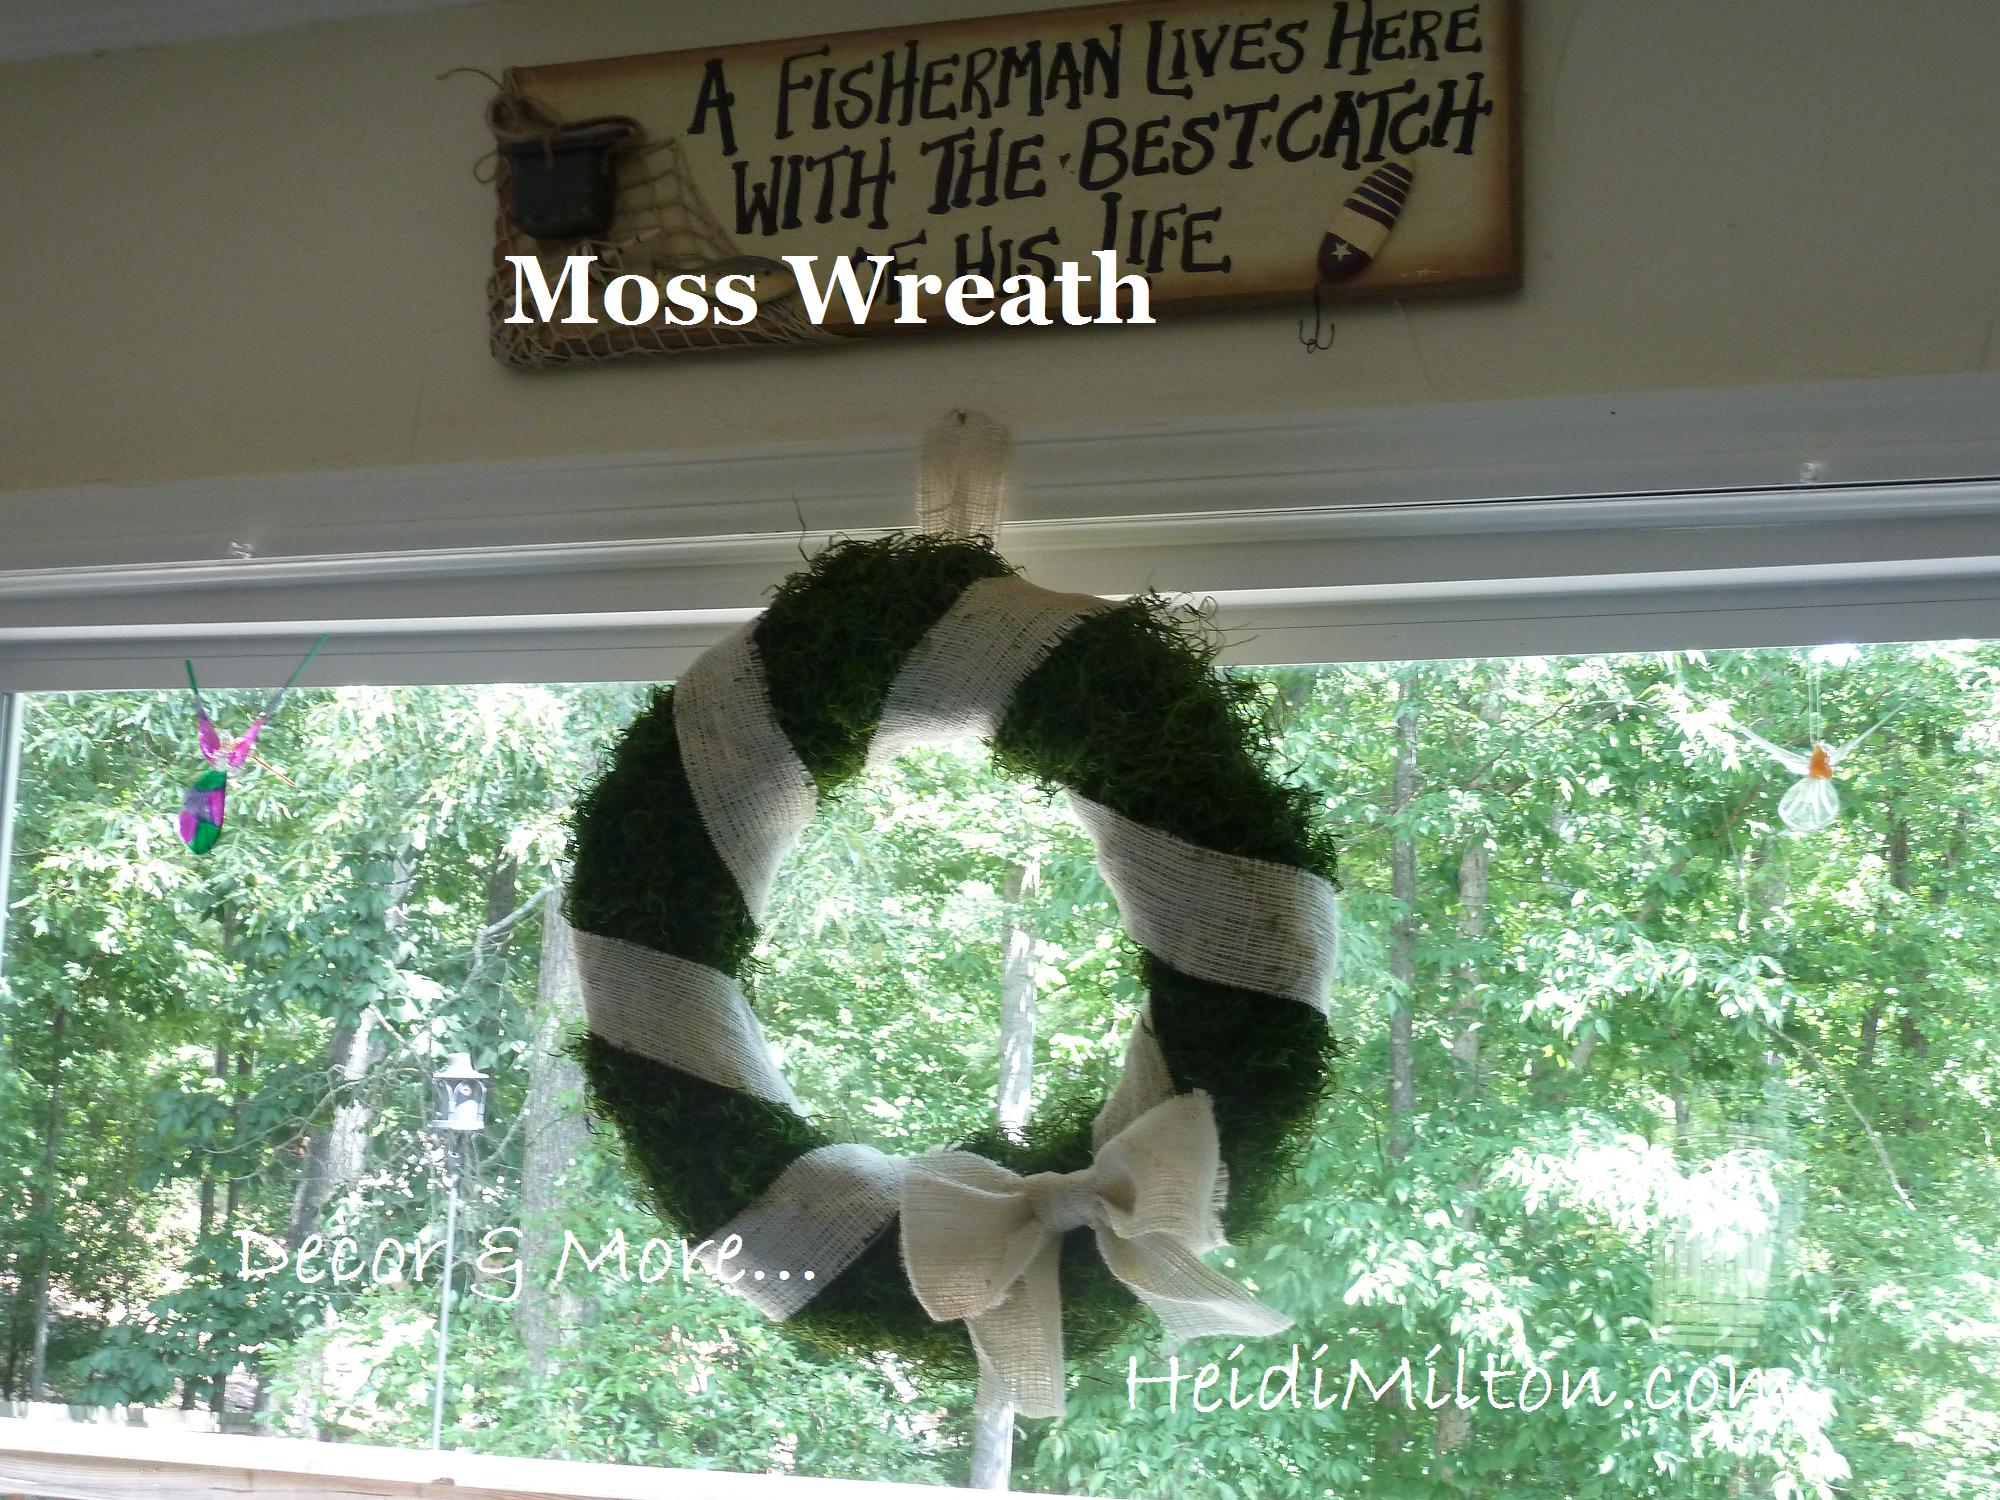
guest post: moss & burlap wreath tutorial {by Decor & More}

Hello, Stay-at-Home Artist readers! I'm Heidi and I blog about home decor DIY and inspiration over at Decor & More. 


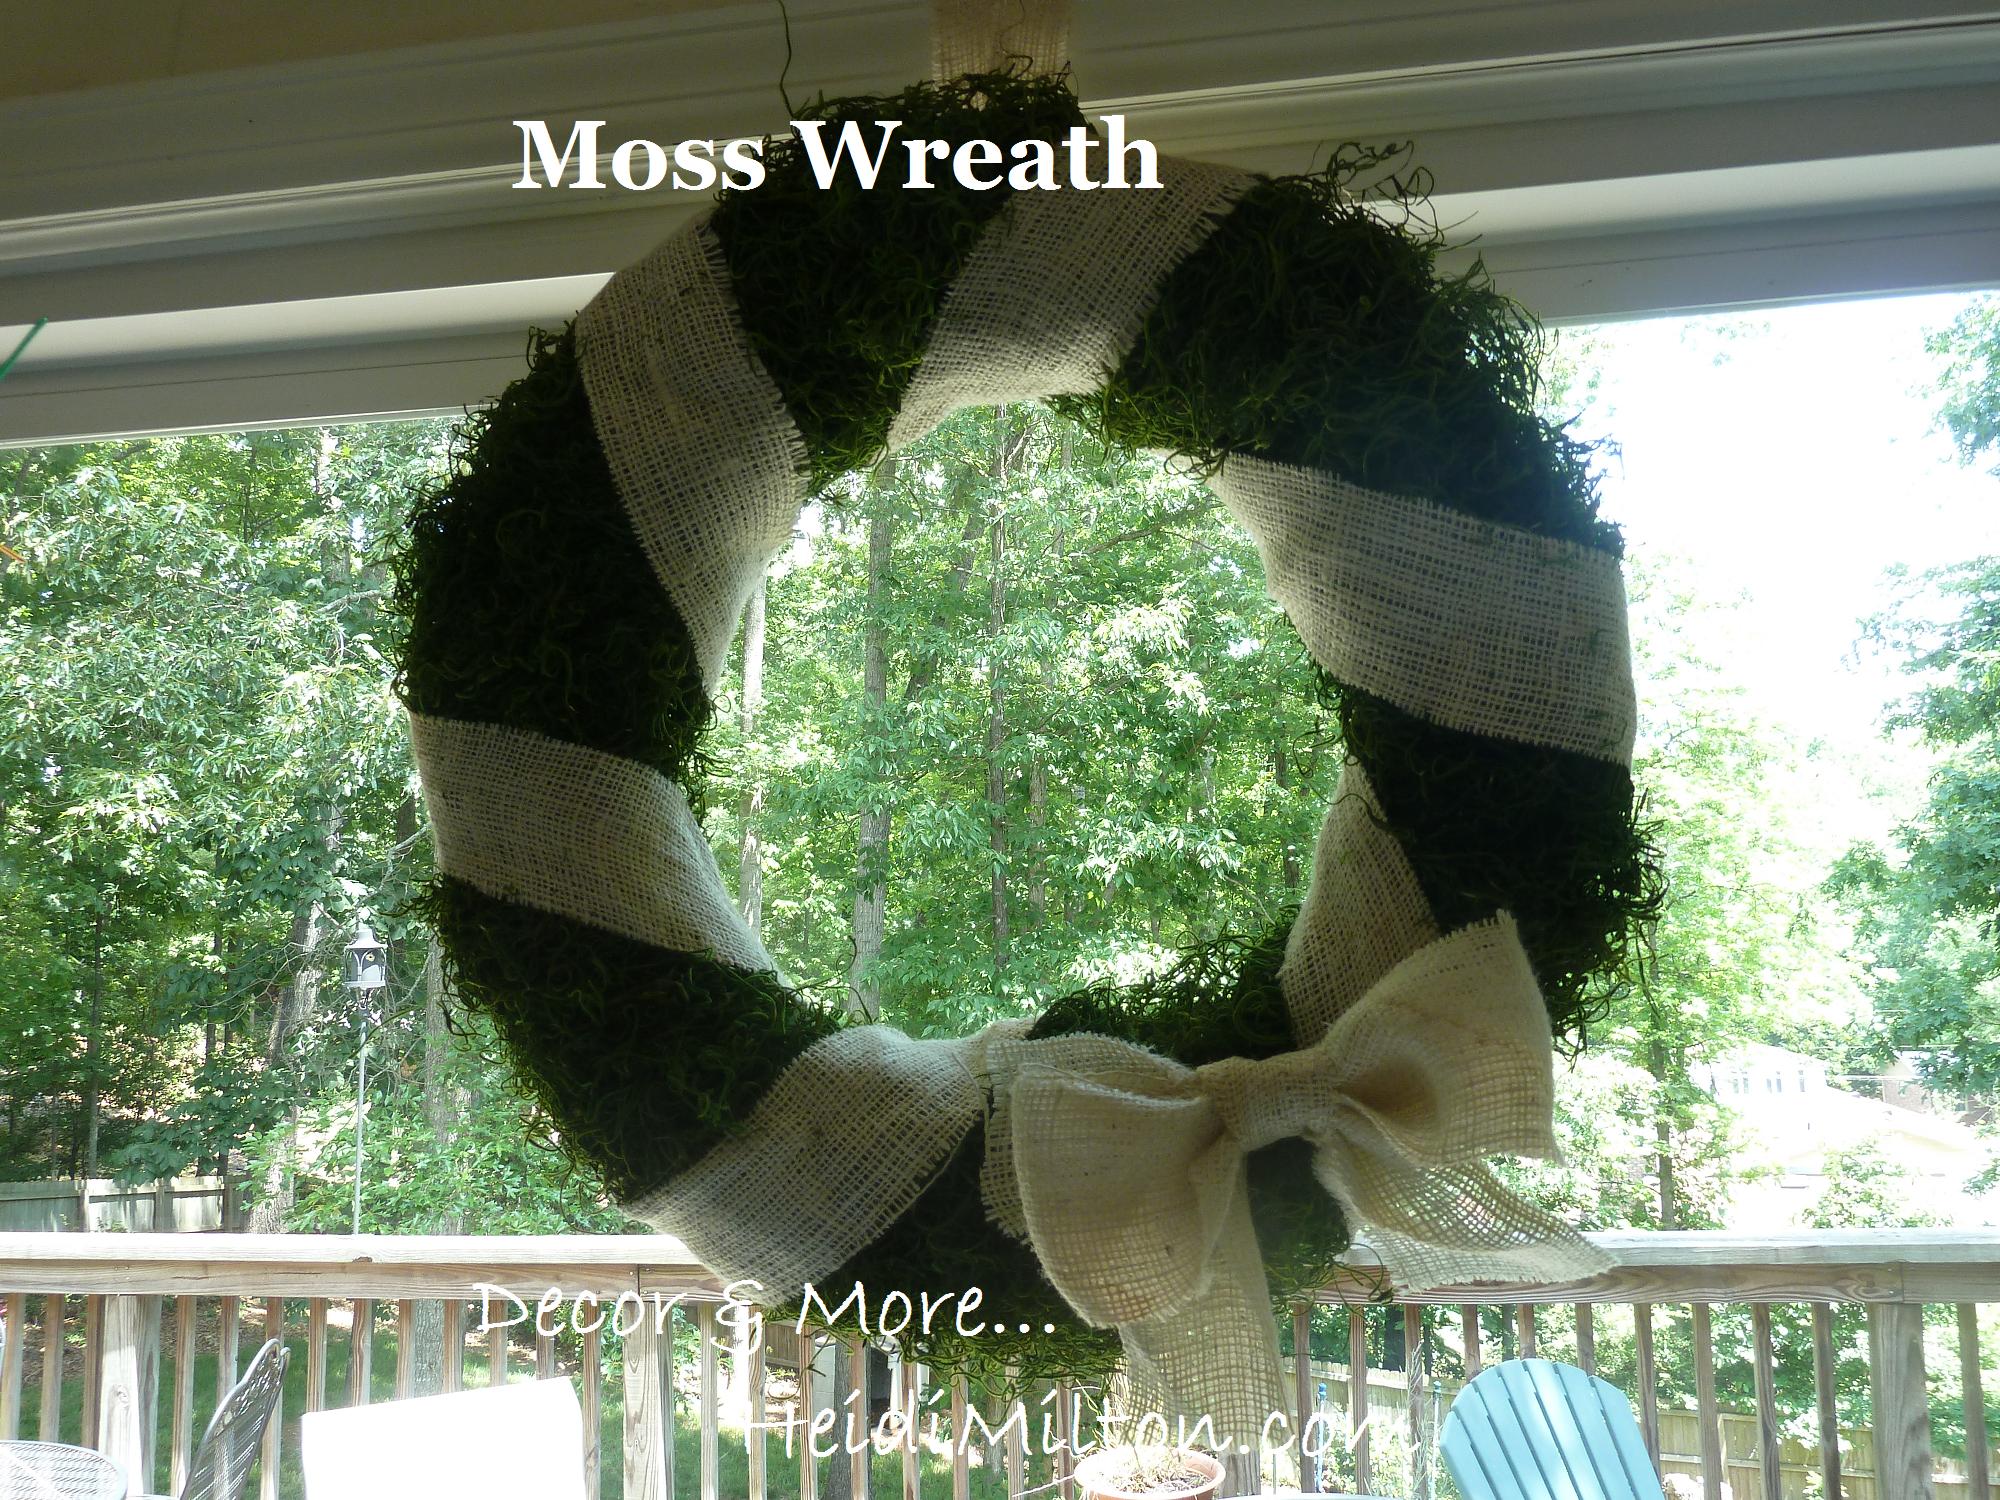
 Kacey's blog was one of the first blogs I started reading and I love her creative spirit, so I'm thrilled to be hanging out over here with y'all. I thought I'd share one of my favorite DIY's to date -- my Moss & Burlap wreath. I made this last spring, but it's hung around (literally) in different rooms of my home ever since. I think it would super simple to tweak for the holidays, too. So here's the how-to!


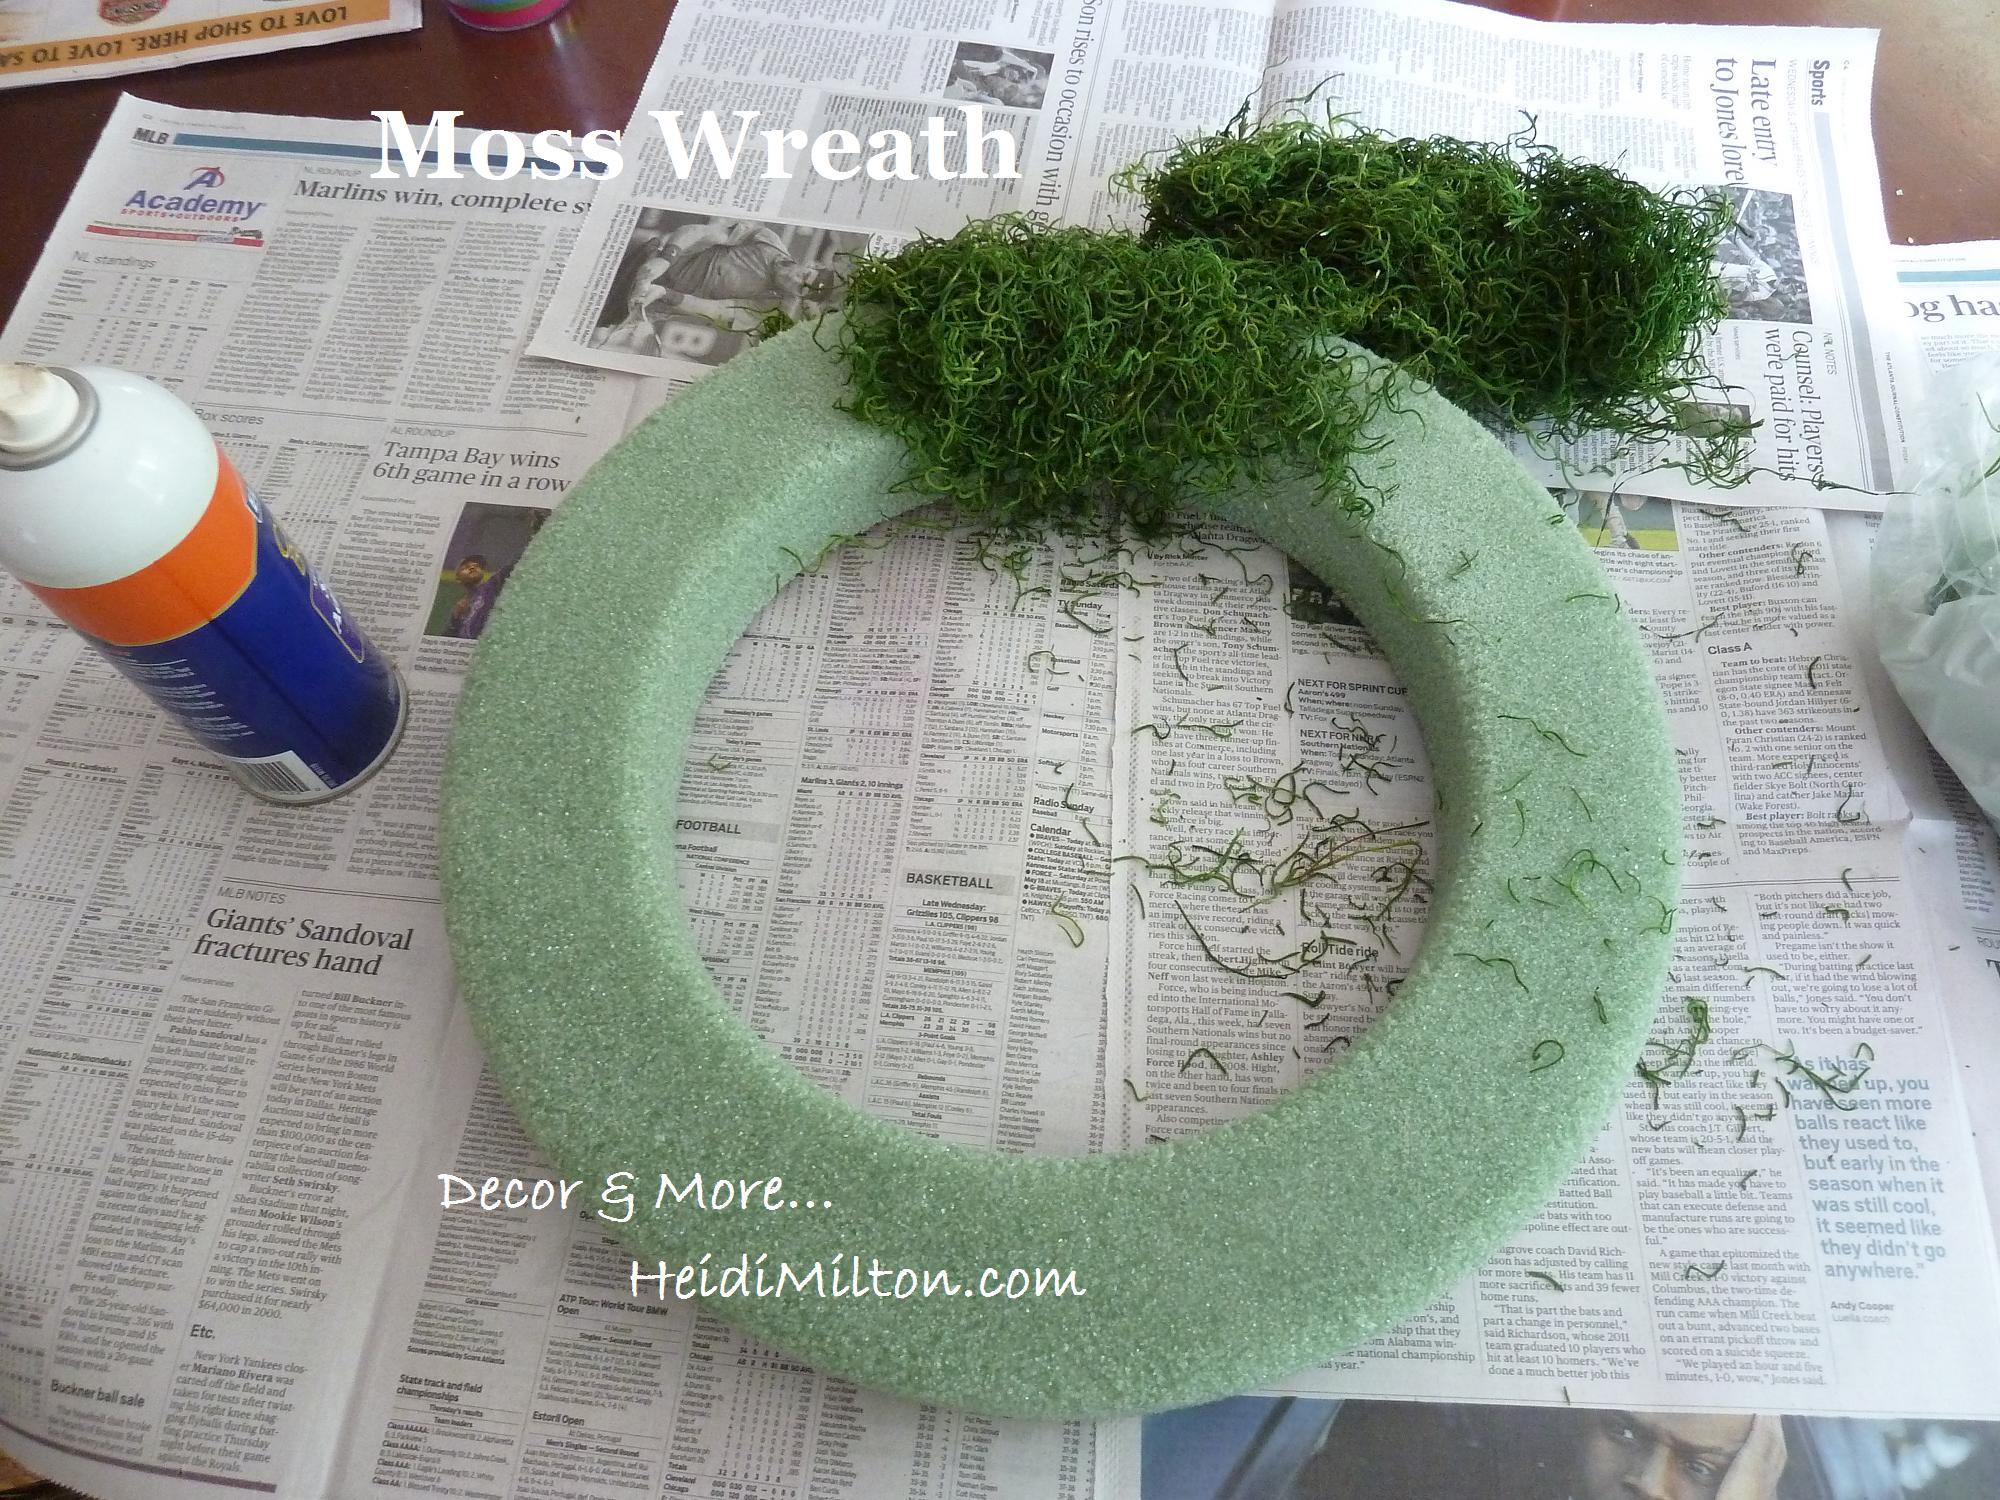
 I gathered up a few things I had laying around from other projects: a wreath form, moss, spray adhesive, and burlap scraps that I cut into strips (a poor girl's version of burlap ribbon!).


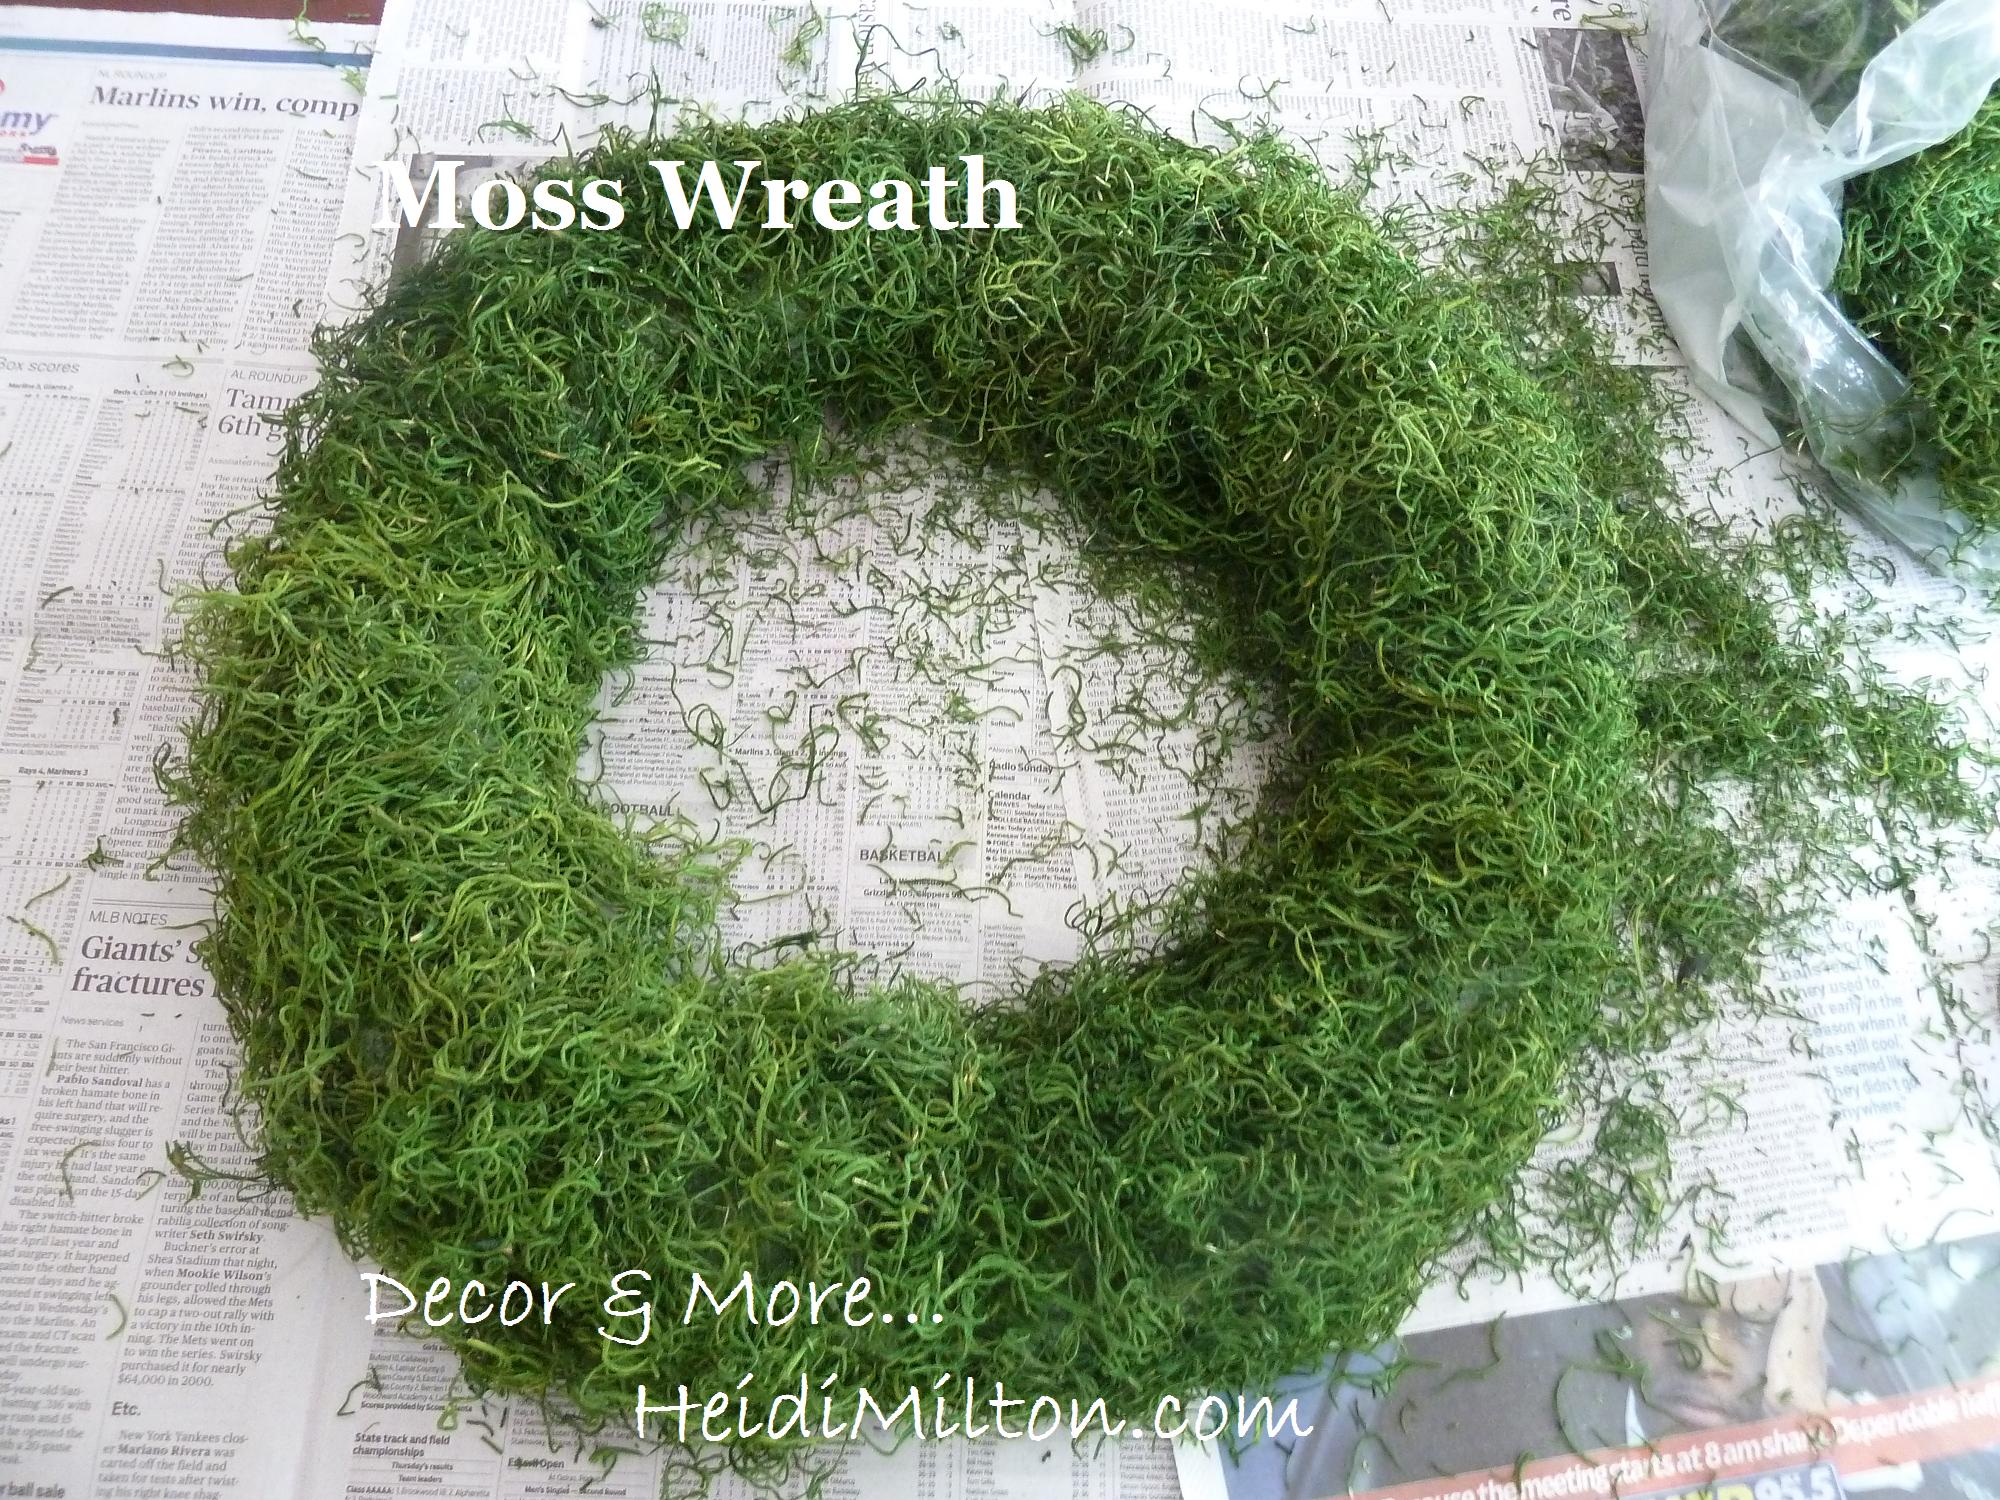
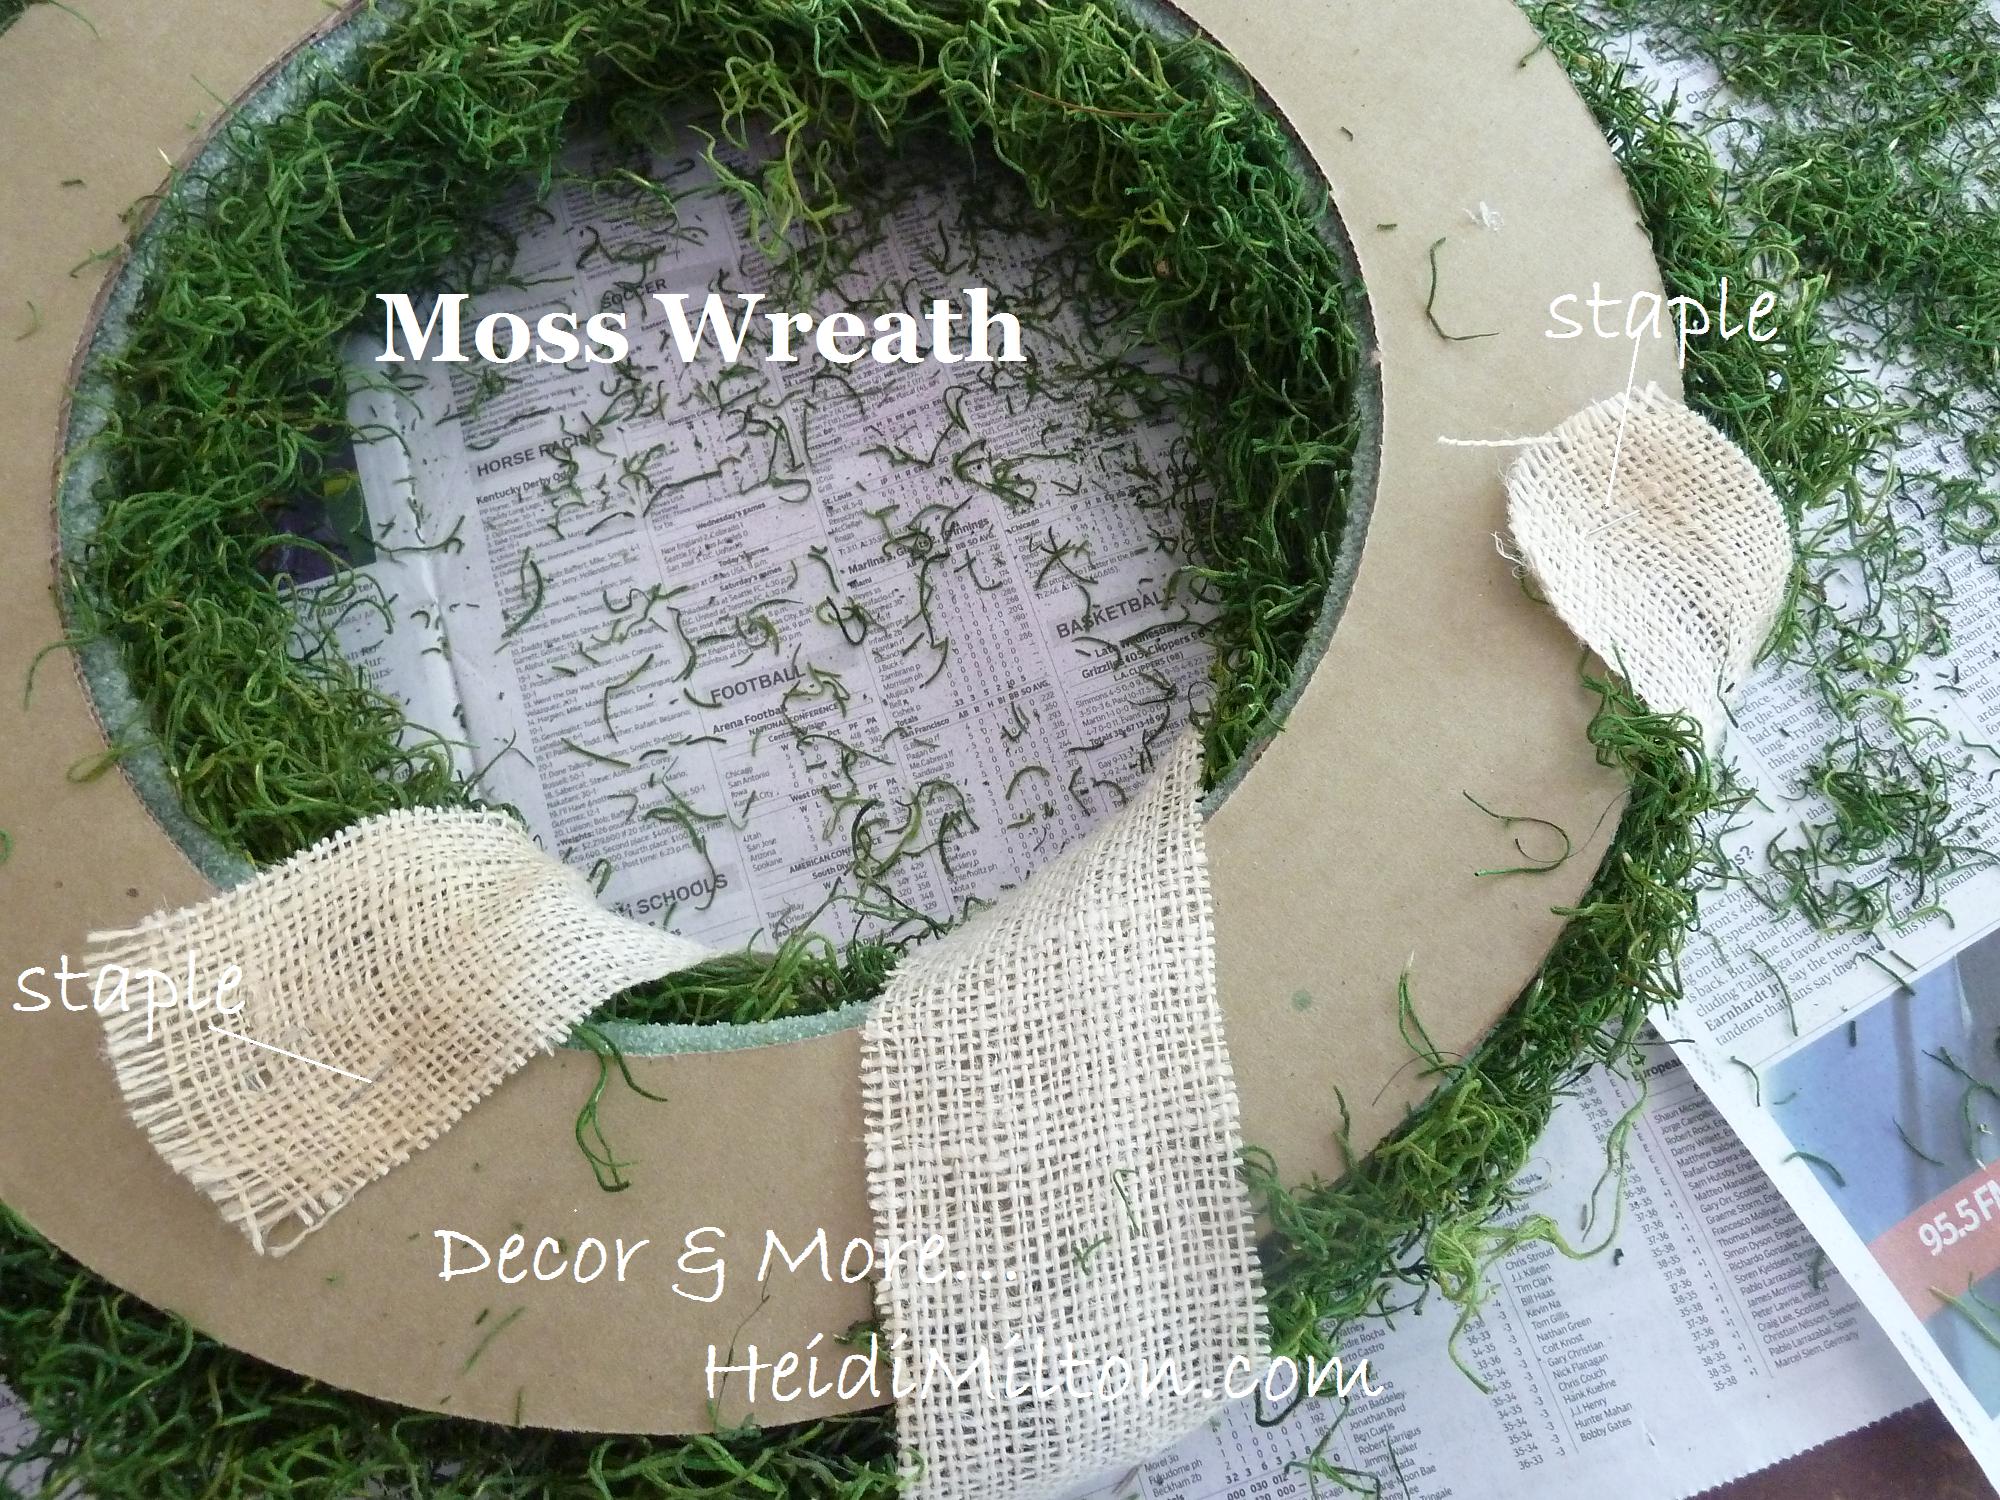
This part was super easy. I simply sprayed my Elmer's Spray Adhesive in small sections and pressed the moss into place once the adhesive became tacky. The hardest part was containing the mess that little bits of the moss made.


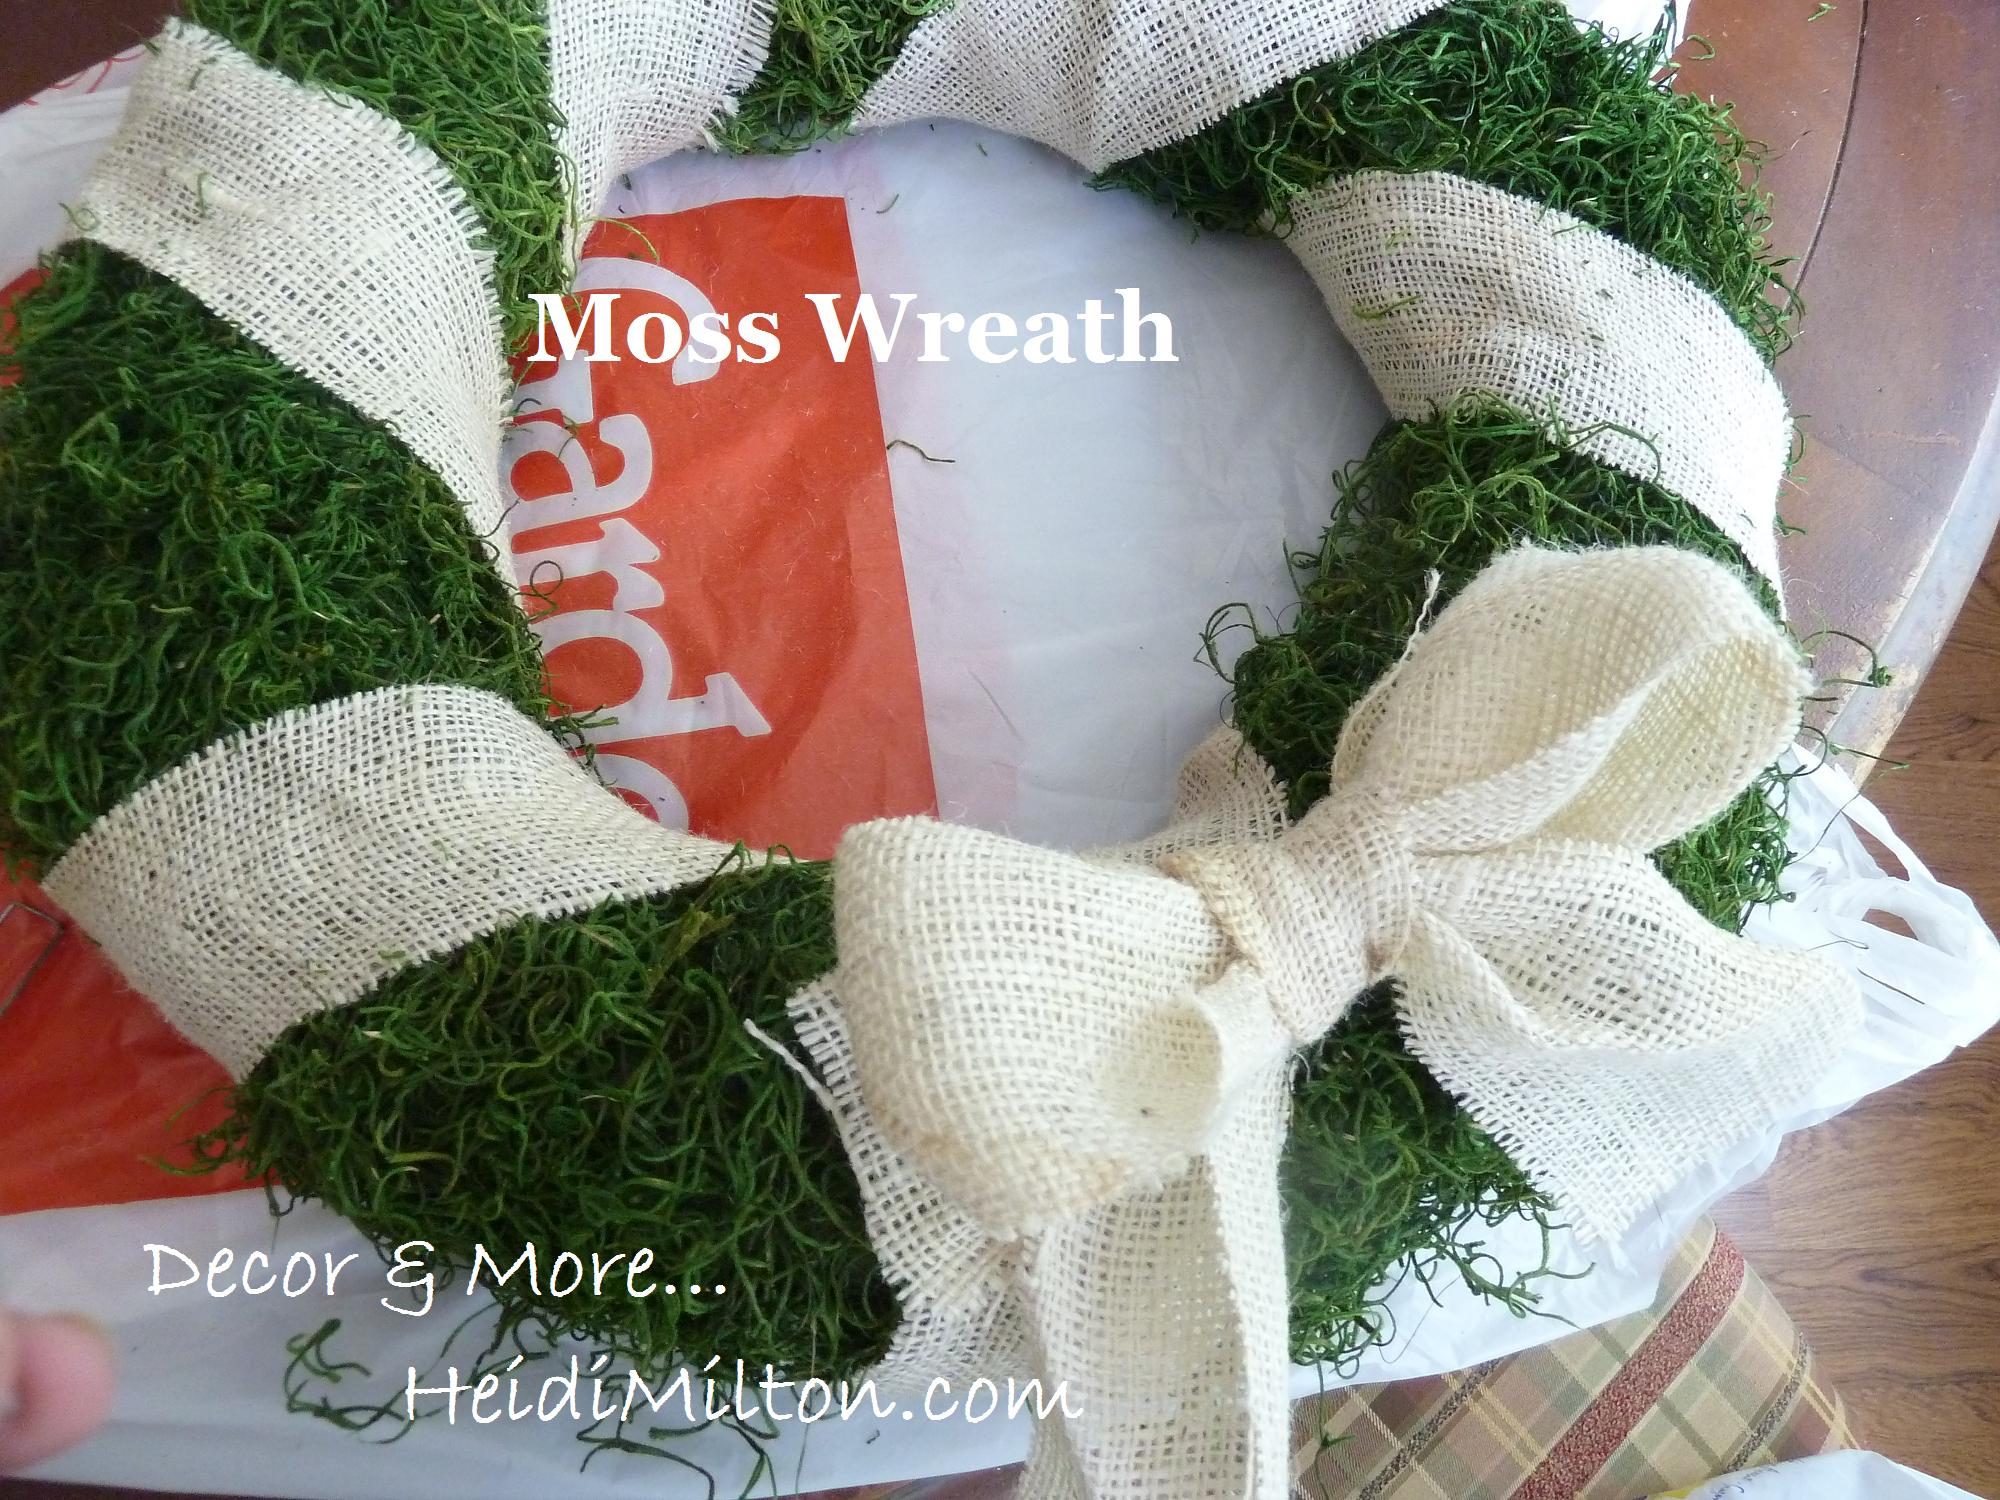
Once it's entirely covered, you made need to beef up your moss in a spot or two. See the mess I made? :) I let everything set for about 15 minutes after I finished applying the moss. Then I started working with my burlap strips. Because I cut these from scraps, each one is only long enough to wrap around the wreath once. So I stapled the ends into the backside of the wreath.


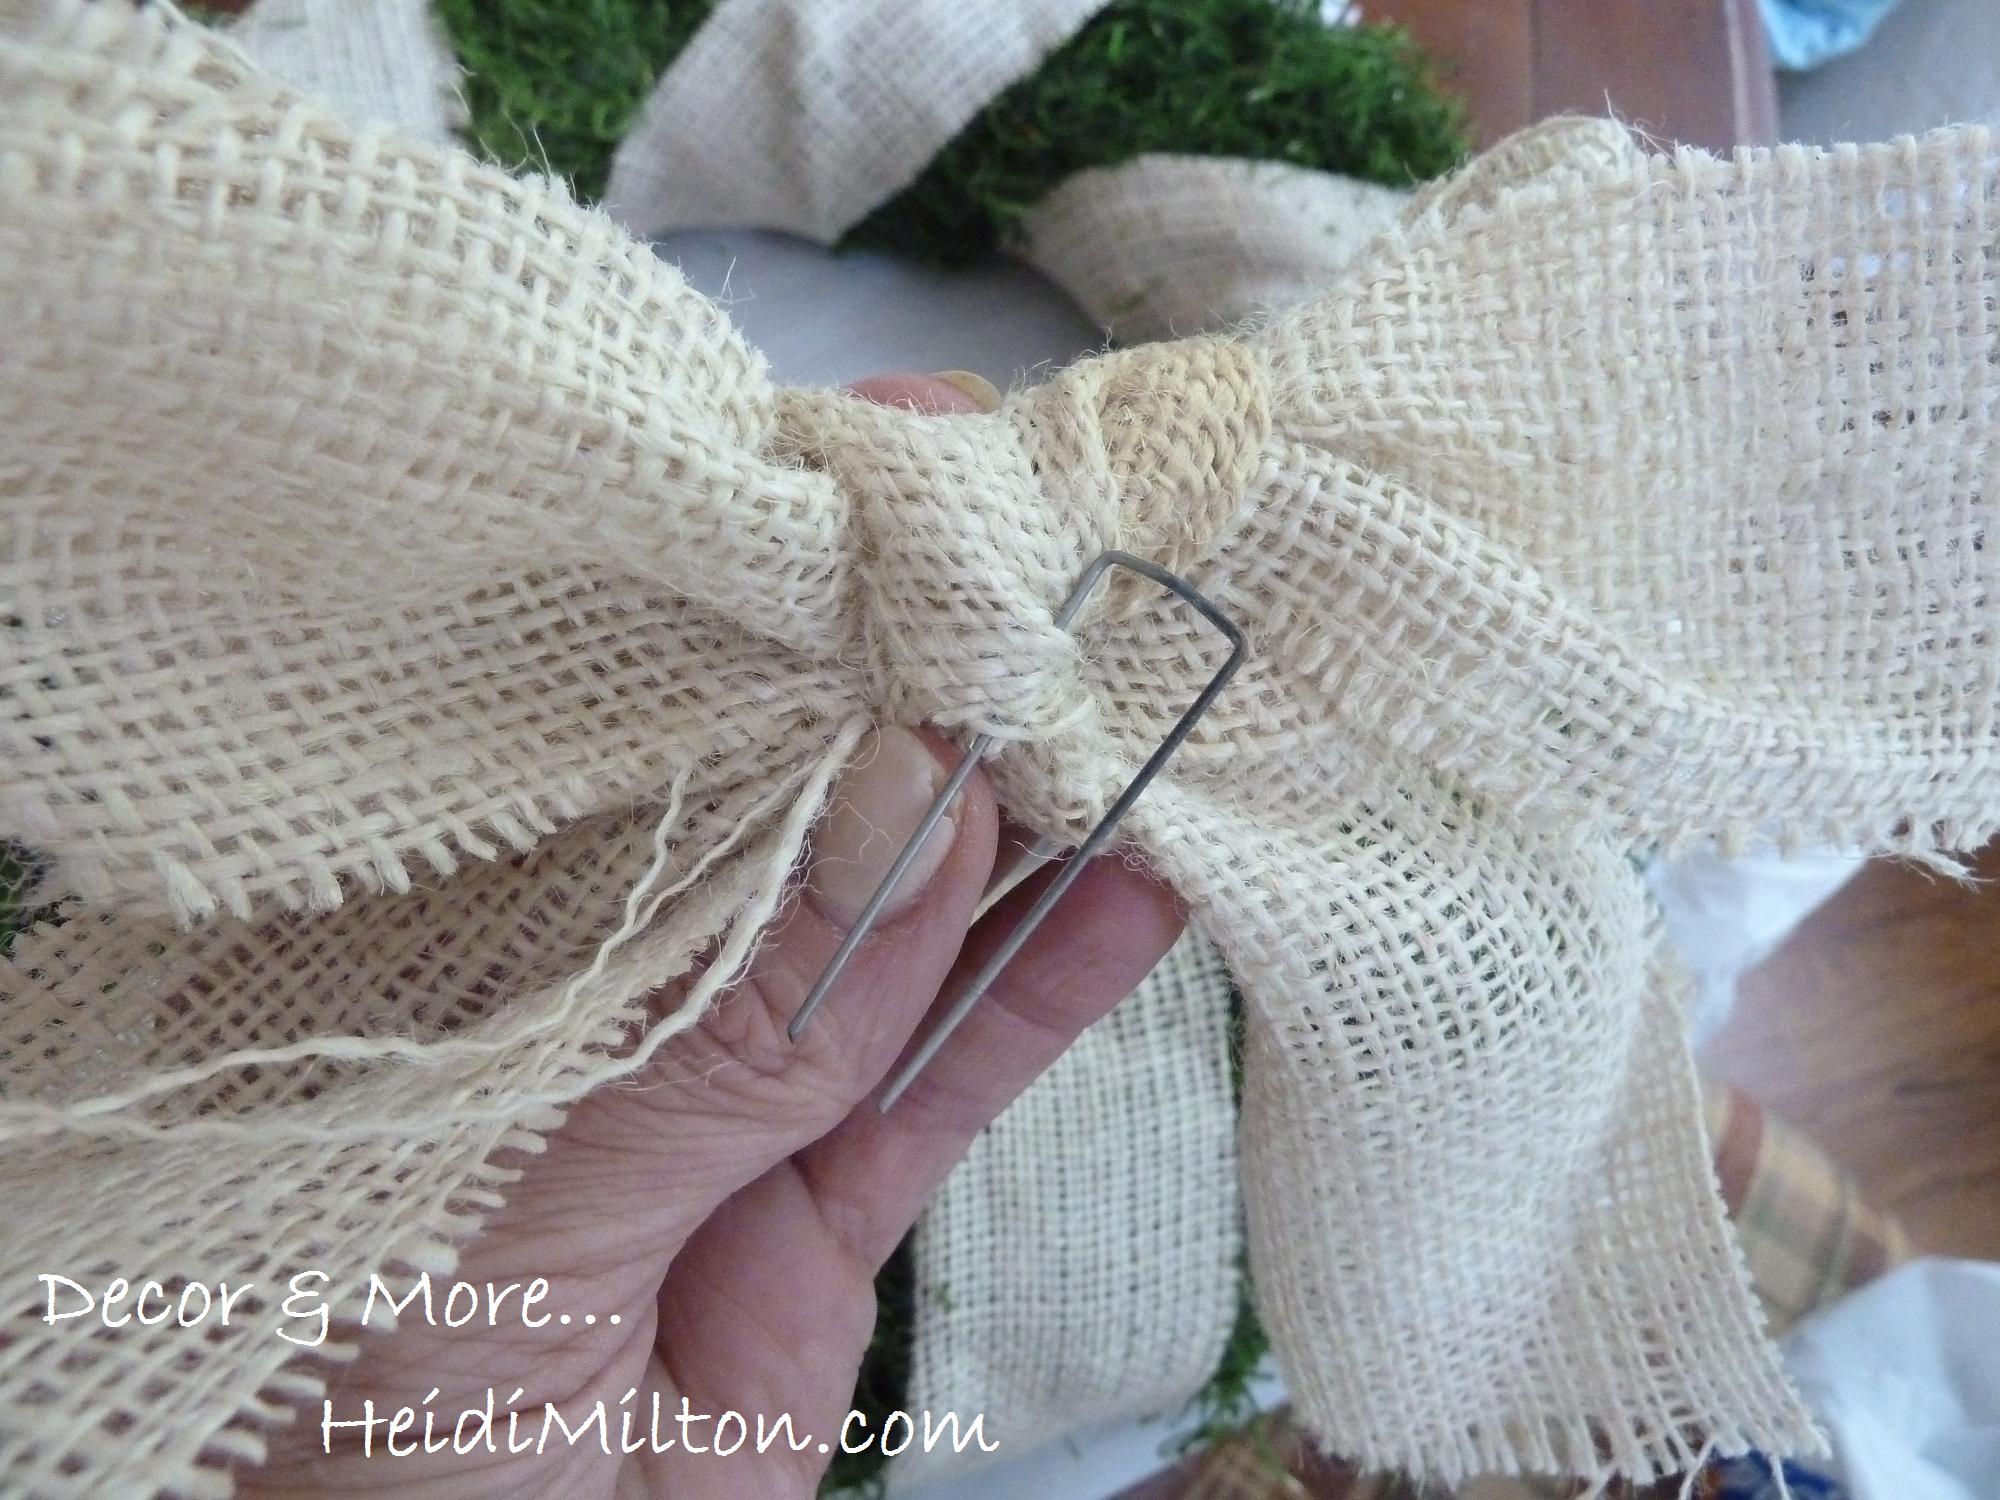
 If you're using a wreath form that doesn't have cardboard backing, you can secure your strips/ribbon with floral tacks. Again, I was using what I had on hand. Now, I knew I wanted a burlap bow on this. So I looked up tutorials on Pinterest. Trouble is, the only ones I found were for burlap tibbon. I was dealing with burlap strips, so all the tutes I tried were utter failures. I resorted to a very simple bow. The simplest of bows. Then I stuck a tack in it.


And stuck it on the wreath, making sure it went into the styrofoam.


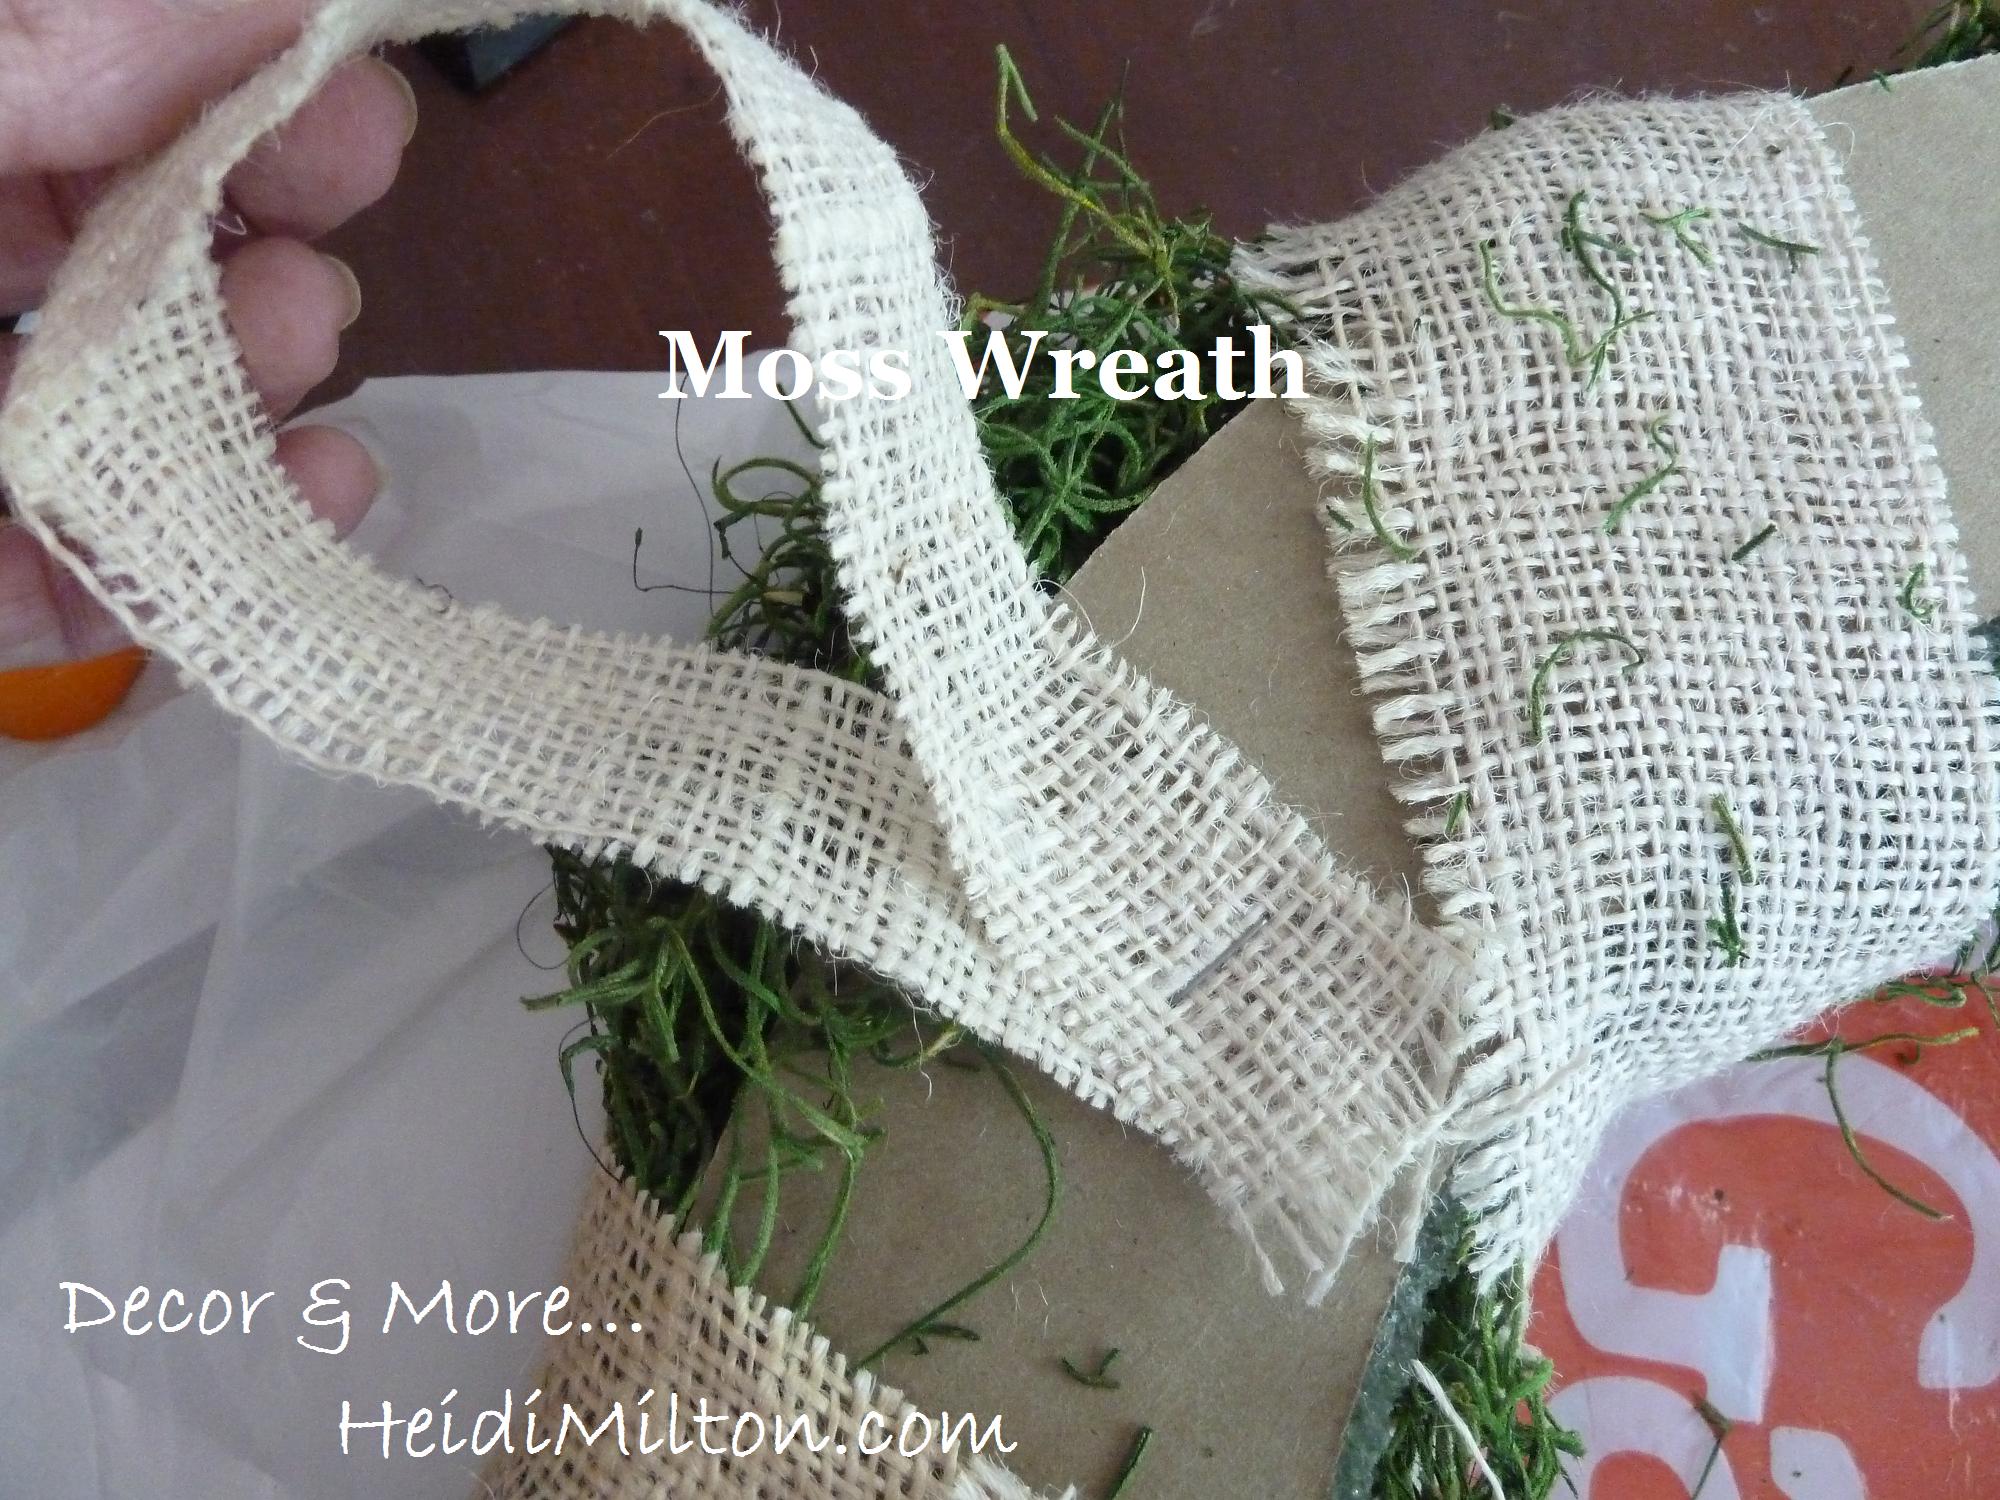
 I used another strip to make a loop on the back for hanging.


You can see how I roll. Easy peasy.


 I'd love to hear from you if you give this project a try! Come visit me at Decor & More anytime... you can also find me on Pinterest, Facebook, and Twitter (@heidimilton). Thanks, Kacey, for having me!! Happy wreath-making!
     

Monday, November 26, 2012

guest post: everyday snack napkin gift set {by little green designs}

Happy Holidays!

I'm so happy to be here guest-blogging with Kacey at Stay-at-Home-Artist.  And of course I am so very excited for her and the changes happening in their family that are allowing me to be here, sharing with you, today!

My name is Kate and I'm from littlegreendesigns.  I am a crafter, seamstress, wife, mother, and all-around happy gal.  Come join me on my blog where I like to carry on about family, fun, sewing, and the joy that is life!

Today I have a tutorial for you of one of my favorite handmade gifts.

Cloth Napkins – Cute, Easy and Eco-conscious!


We crafty-people are constantly on the lookout for easy and fast handmade gifts.  With the holidays quickly approaching I am turning to one of my favorite “go-to” gifts: a set of handmade cloth napkins.  Not only are they eco-conscious, but they are also super cute and trendy, can match whatever kitchen they need to, and are a snap to make - even you can do it!

 
These ones specifically are my favorite style and size because they are perfect for every day use.  They're smaller than a regular dinner napkin but just as useable.  My family uses them at Breakfast, Lunch, and Dinner, and every snacking moment in between.  They're the perfect size for a muffin on the go, a late night TV snack, or even in kids lunch boxes!

One Gift Set = 12 coordinating cloth napkins

**See Below for a Printable version of this How-To**

Supplies:

* 1 yd each of two coordinating fabrics
* sewing machine
* iron
* coordinating thread
* corner-pushing-pokey-thing-tool (that's a technical term, see step 3 for details)

How To:

Step 1 - Cut fabrics into a total of 24 - 10" squares.  12 of each fabric.

Step 2 - Place two pieces of same fabric right sides together and stitch 1/4" from edge. Leave a 2" opening along one side.  Clip Corners.

Step 3 - Turn napkin right side out through 2" opening and use preferred corner-pushing-pokey-thing-tool to push all 4 corners out into defined points.  (My preferred tool is the rounded back end of a skinny paint brush, it's just perfect! It's not too sharp but also not too big and fat.)

Step 4 - Iron and topstitch around napkin.

Step 5 - Repeat 11 more times to finish napkin set.

Step 6 - Wrap them up and give them away!

SIDE NOTE: If you want to cut costs you can do 1 yard of fabric instead of 2 and just do one color.  This makes for a smaller set of 6 napkins.  If you decide to purchase less than 1 yd so you can do multiple colors for less money please make note that you need to purchase in 1/3 yd increments, not 1/2s.  You can cut 4 of the 10" squares in 1/3" yd, which would turn in to 2 napkins.  Use this info as a reference in quantity planning!


If you're anything like me, I don't like to be tied to my computer when I am sewing.  I like to shut down, turn up my ipod, and rock out.  And so I have created a one-page print out of this tutorial so that when you go to work you can have the info, and my mad teaching skills, at your fingertips.

Click HERE to download the print out!

Happy Holiday Crafting!

Monday, November 12, 2012

guest post: cranberry chutney recipe {by TaylorMade}


Hi, My name is Taylor and I write Taylor Made - a lifestyle and craft blog. I love art, food and being a mom to my two crazy boys :) I posted this last year on my blog but I posted it after Thanksgiving and I am so glad to share it before the holiday season this time around!

A little back story: My aunt made this for Thanksgiving and brought it to my Mom's house about six years ago. It was a REALLY big hit with us. Now, I wonder why every family doesn't make it. It it the perfect accompaniment to every holiday feast. The citrus and black pepper cut the sweet and savory perfectly. We always say "I think I just need to have this on hand for life". It's that good. So, we emailed my uncle to get the recipe. Then I was curious and I googled it, I found many similar recipes that were named Cranberry Salsa but none exactly like this one. Does anyone make anything like this? If not, do yourself a favor and whip some up for Christmas. I followed my Aunt and Uncle's recipe exactly. My Uncle called it "Hudson's on the Bend Cranberry Chutney" which is a restaurant in Austin, TX, where they live. I wonder if this is some coveted secret?? My Uncle said "The trick to this recipe is to trust the ingredients…..don’t add to or subtract from".


Hudson's on the Bend Cranberry Chutney
12 oz pkg of cranberries
½ cup fresh lime juice and ZEST
2 shallots
½ tsp of salt
1 whole bunch of Cilantro
2-3 cloves of garlic
1-2 seeded jalapenos
1 ¼ cup light brown sugar
¼ cup coarse ground pepper


Blend together in food processor. 


My food processor isn't large enough so I mixed everything together in a bowl then "chopped" in batches.

I put mine in mason jars and added a fall leaf with twine. But lets be honest, you could serve this out of some old tupperware with a plastic spork and it would be pretty. 


So... was this on anyone else's Thanksgiving plate? All of the recipes I found online called for green onion and white sugar with no black pepper (which I have to say is a definite must). And does anyone have a secret family side that is out of the norm?

Wednesday, November 7, 2012

guest post: pumpkin coconut bisque

My friend Sari emailed me a fabulous fall recipe to share with you guys today.  I think it would make a great Thanksgiving appetizer....

This is the BEST pumpkin soup! I am not normally a huge fan of pumpkin soups because of how sweet they can be. This one has a nice kick to it. Here is my adaptation of the recipe to make is a little healthier and vegetarian.


Pumpkin Coconut Bisque
adapted from Simply So Good

Ingredients:
2 tablespoons butter
1 cup chopped onion
3 garlic cloves, minced
3 cups canned cooked pumpkin
2 1/2 cups canned vegetable broth 
1/2 tablespoons agave
½ teaspoon ground allspice
¼ teaspoon crushed red pepper flakes
1 tablespoon fresh ginger
½ teaspoon salt
2 cups Silk coconut milk
Ground nutmeg

Directions:
Melt butter in a heavy large pot over medium heat. Add onion and sauté until golden. Add fresh ginger and garlic. Saute an additional 3-4 minutes. Add pumpkin, broth, sugar, allspice, crushed red pepper and ginger. Bring to a boil then reduce heat. Cover and simmer until flavors blend, about 30 minutes. Ladle the soup into a blender and puree until a smooth consistency. Return the soup back to the pot and add coconut milk. Bring back to a simmer. Season to taste with salt and pepper. Ladle soup into bowls. Sprinkle with nutmeg and serve. Makes 4-6 servings.

Thanks for sharing, Sari! :)

Sunday, November 6, 2011

craft spaces at Taylor Made...

Taylor of Taylor Made is hosting an awesome "Craft Spaces" event full of room tours, tips, and more...


I'm guest posting today, so head on over to see my recently updated craft space!

Thursday, September 8, 2011

guest tutorial: spray painted lace lamp shade

Have you checked out Add Some Paint?  It's a new blog with some great DIY ideas.  Jenna, one of the contributors, has put together a cute thrift store lamp re-vamp to share with us today...

Hello! I am excited to be guest posting today! I will be showing you how you can use spray paint and lace to create an amazing pattern on a boring old lamp shade.

Over at AddSomePaint.com, we are a group of frugal sisters who love inexpensive projects. So, naturally, I bought this lamp from The Goodwill for $4.99.

I spray painted the base of the lamp before tackling the shade because my husband and I wanted it to be clean and white. Before you spray paint, mask off the neck of the lamp and the cords with tape and plastic. I used a grocery sack. 


After I spray painted the lamp base, it was time to choose what color(s) to spray paint the lamp shade. I experimented with scrap pieces of paper. First, spray a small amount of spray adhesive glue on paper, and lay a chunk of lace over the sticky paper and smooth it down so it sticks.


Then, spray your color of choice over the top of the lace.


I tried a few different approaches:

  • I spray painted the paper, then laid the lace down, then spray painted a different color;
  • Laid the lace down, spray painted one color (heavy on the paint), and then another color on top of the original;
  • And any other variations we could come up with.
This part was really fun. My husband and I loved trying different color schemes with different approaches.  Here are a few of the results we came up with:

We ended up choosing color scheme number 3: yellow on the bottom, then lay the lace down, and navy blue on top. The contrast is very fun. (I kept the paper; maybe I will write my mother a note.)


Now that we decided on what colors we wanted to paint the lamp shade, we went to work.

1. Spray the lamp shade with your base color, and let it dry.


2. Spray the lamp shade with adhesive glue and lay your lace over the top. Smooth it down so it sticks well. (FYI: Parts of the lace that aren't stuck down well will appear blurry when you uncover.)

I loved the way the lamp looked with just the lace on top. If the spray adhesive was more permanent, I may have just left it this way... but I continued on.


3. Spray the top of the lace with your second color.


4. Uncover the lace! Let dry.


I haven't found a place for this lamp, but I love the way it turned out. And the great part is that I can spray it again and start all over if I please.


Thanks again for featuring us on your blog today! We hope you like our project.
Also, be sure to also check out our current giveaway. We are giving a lucky reader a gift card to JoAnn's!

What a great project!  I love that they did test sprays on paper to decide on the color scheme...such a good idea.  A big thank you to Jenna and the girls from Add Some Paint.  Head on over to their blog and check out all they have to offer!
Related Posts Plugin for WordPress, Blogger...